See What It Takes to Build Custom False Ceiling Beams
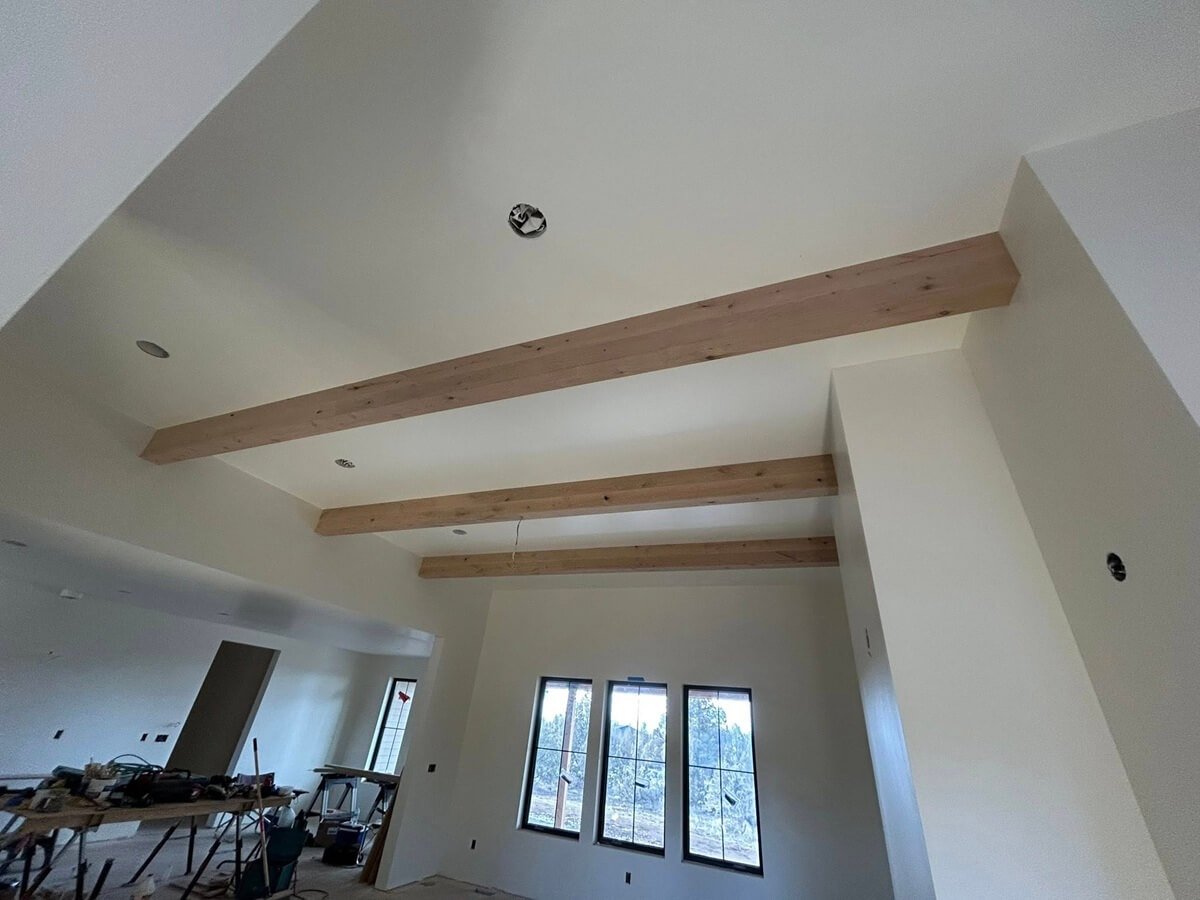
Some projects look simple once they’re finished, but the level of craftsmanship behind them tells a much deeper story. Recently, Frank L. Garrett Construction completed a set of custom false ceiling beams and a wrap-around fireplace mantel in a Central Oregon home that will be featured in the Tour of Homes.
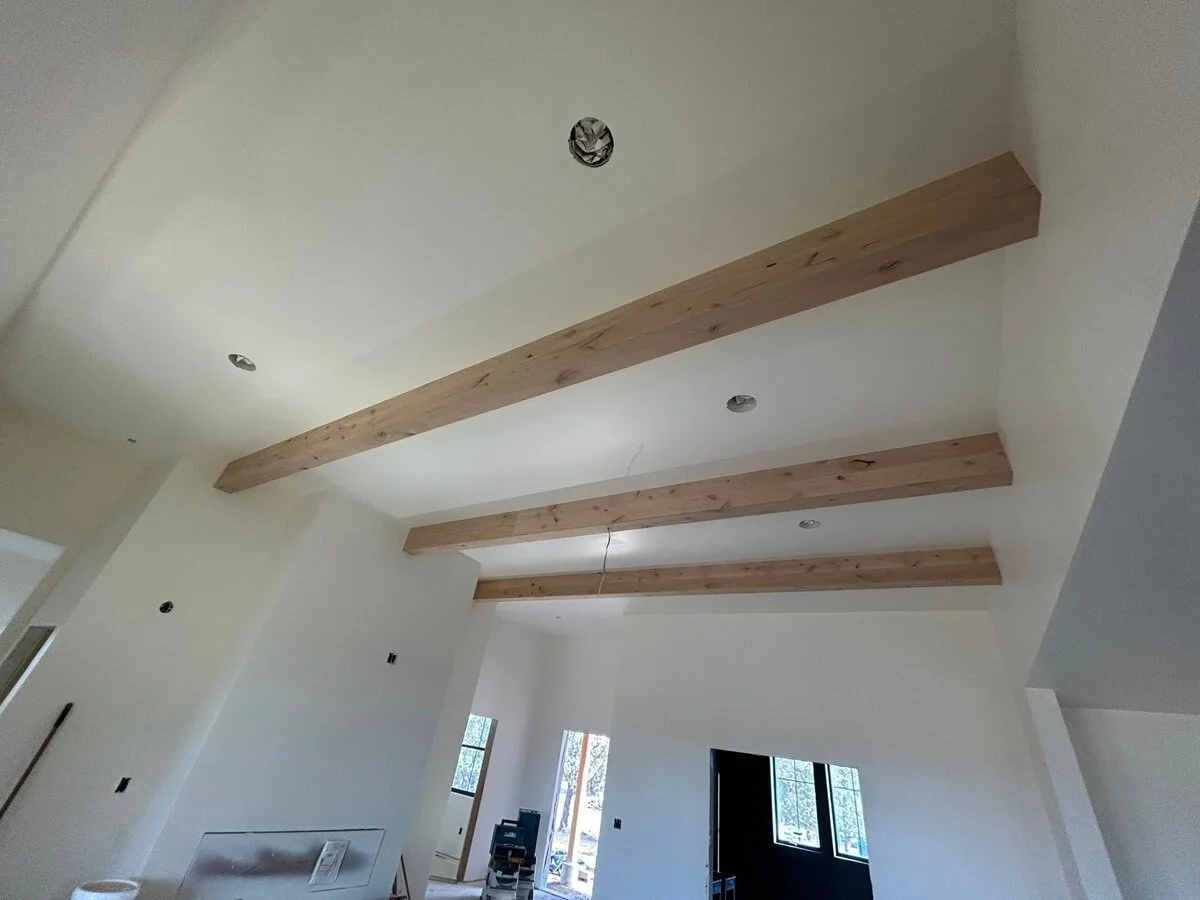
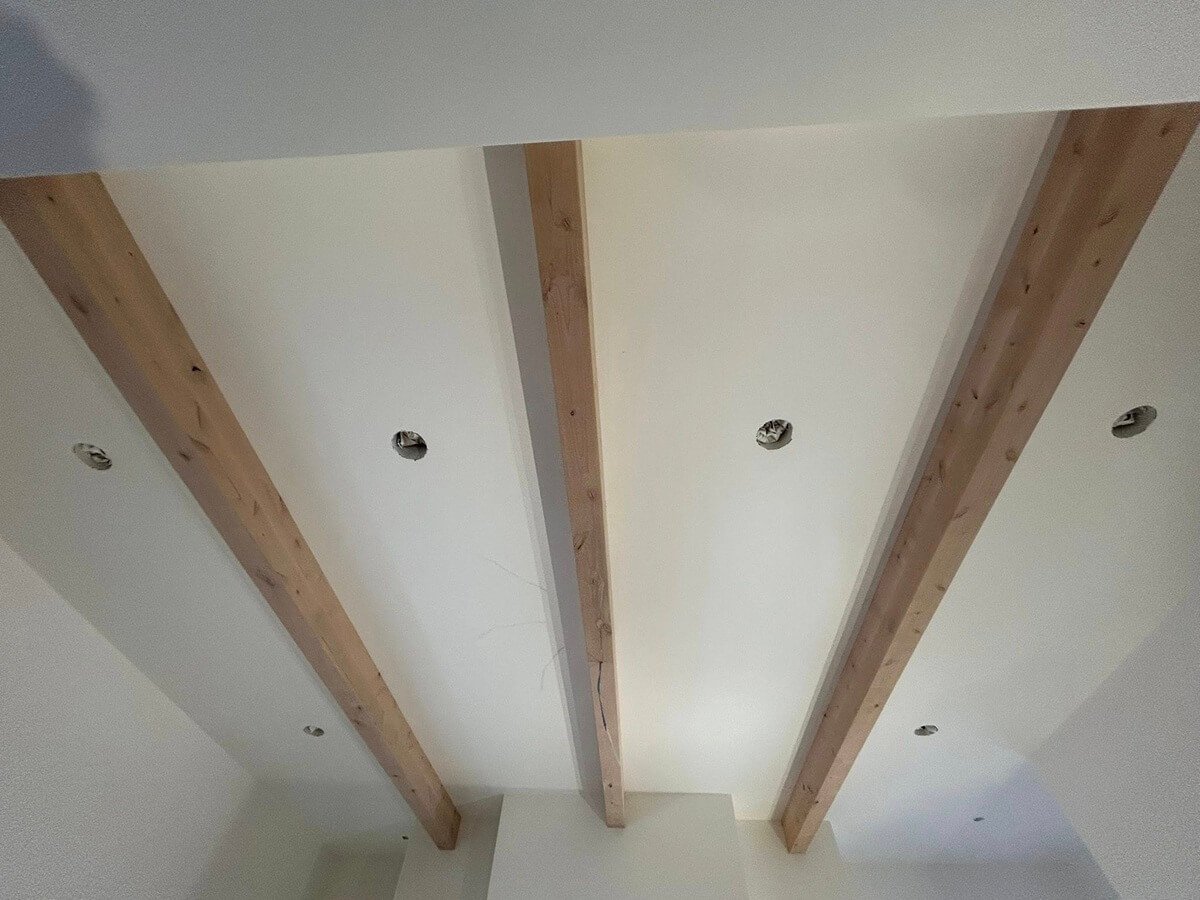
The beams were built from knotty alder and measure 6 inches wide by 10 inches high, stretching nearly 12 feet across the ceiling. Achieving a tight, seamless fit across spans that long requires careful planning, precise joinery, and a methodical installation process.
Building a Safe and Precise Work Platform
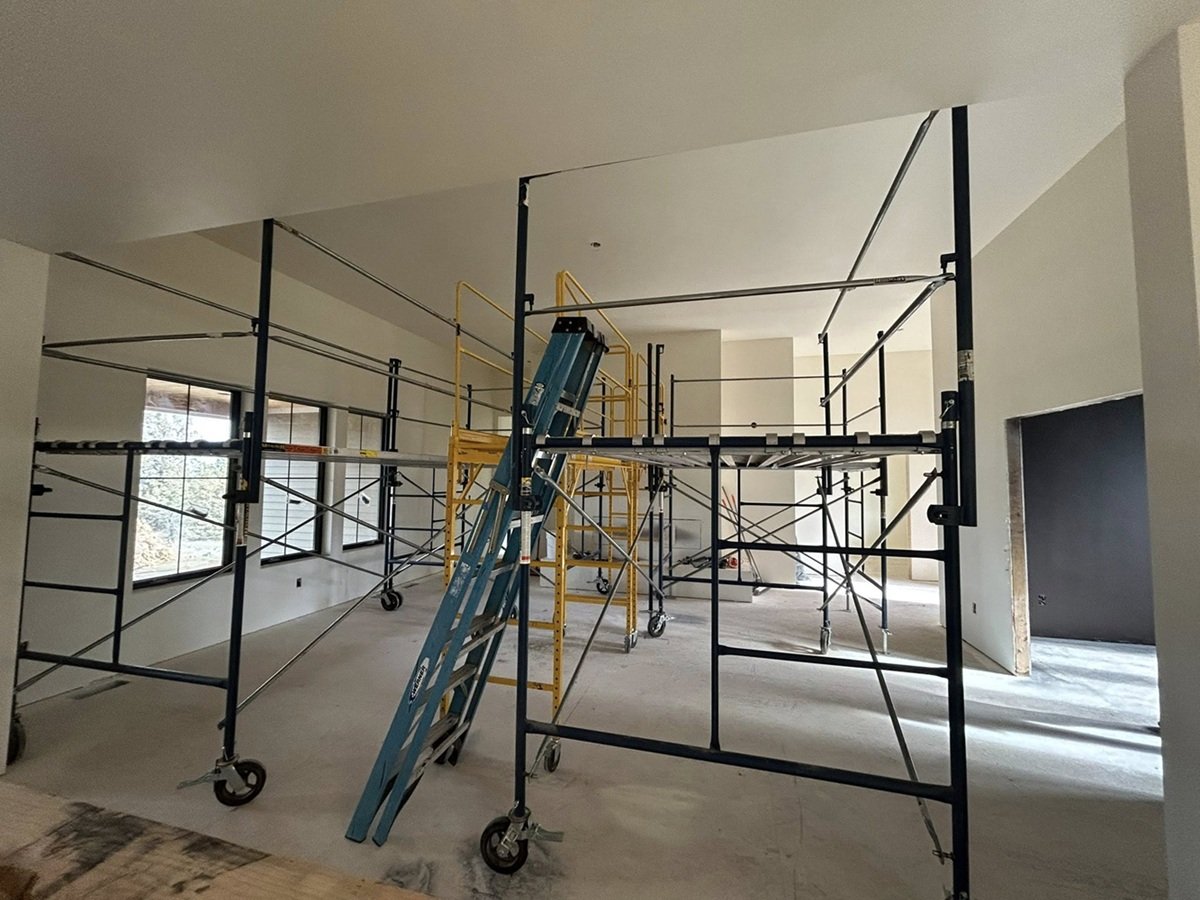
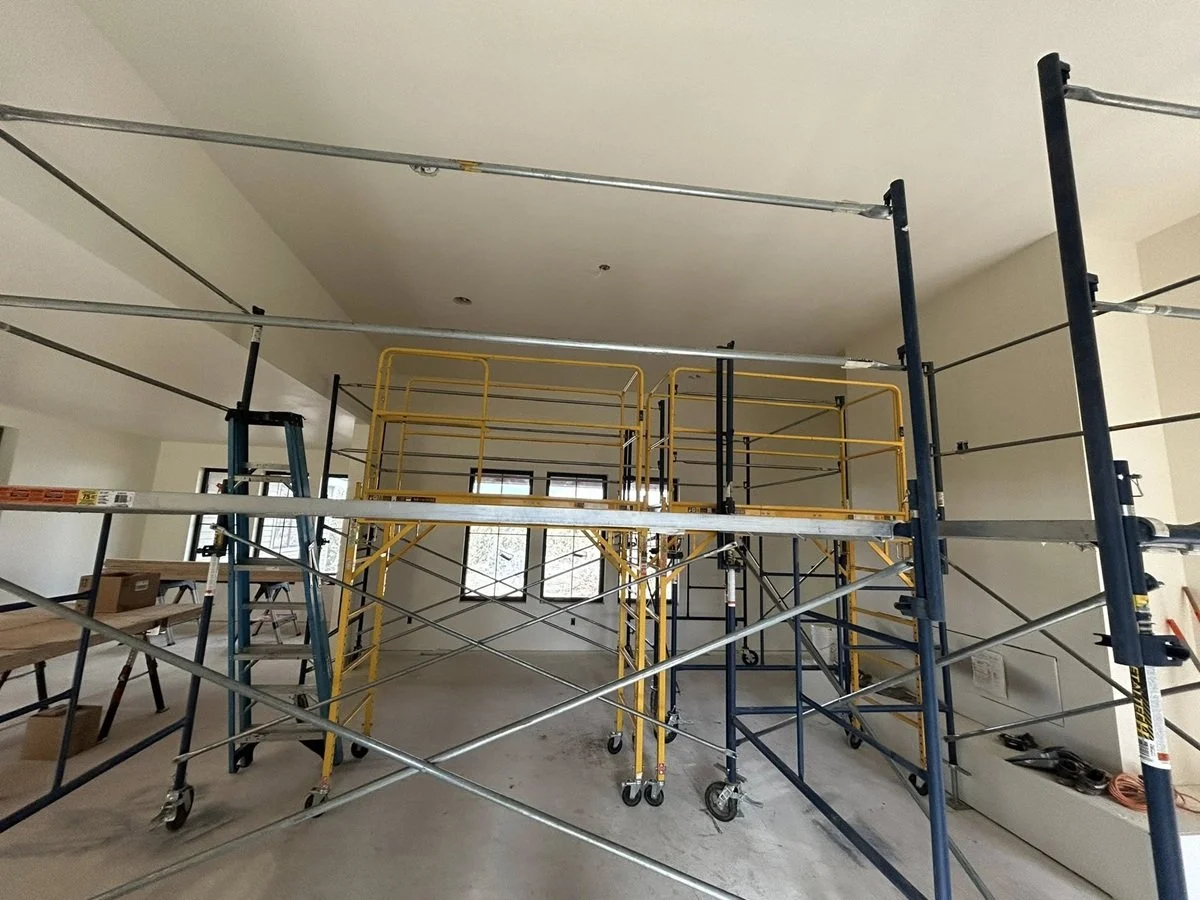
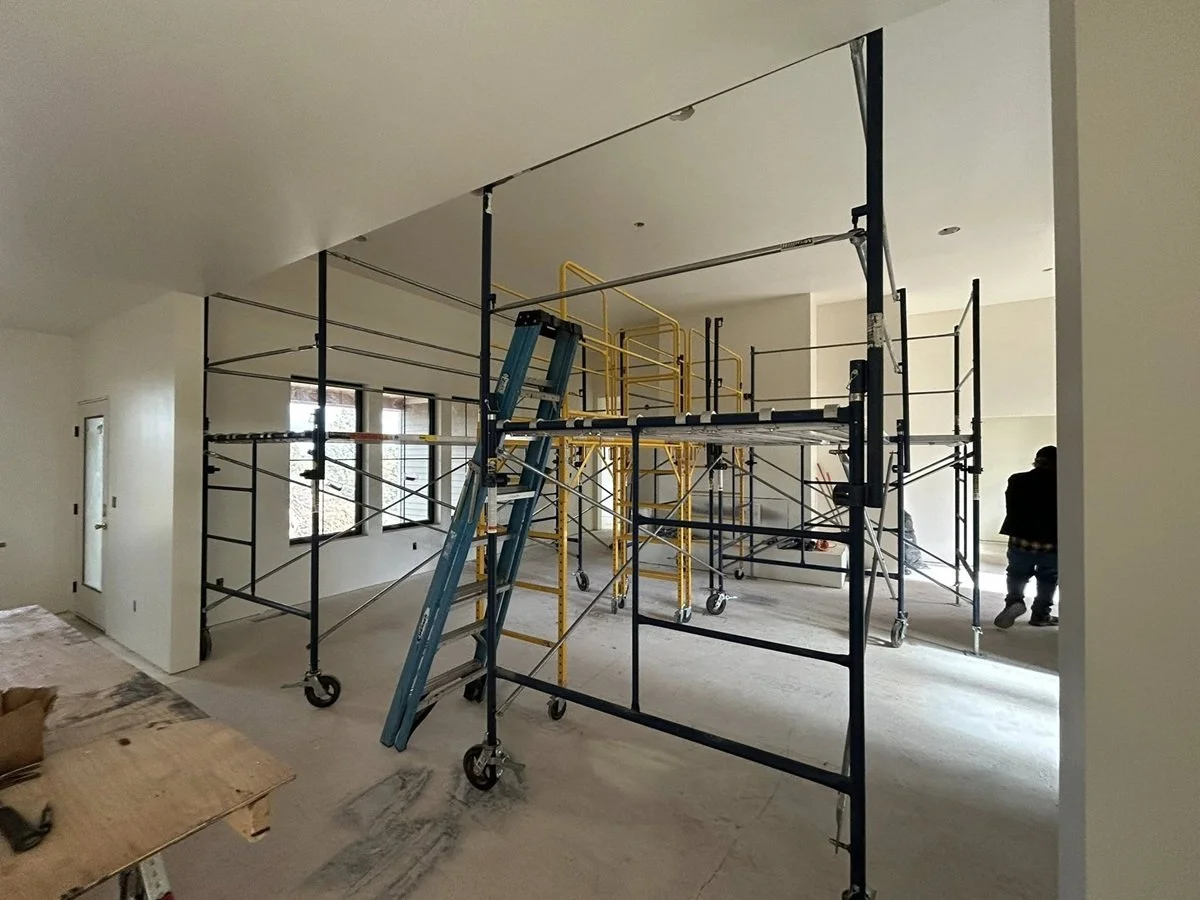
Ceiling beam installations require extensive preparation before any woodworking begins. For this project, the first step was setting up a full scaffolding system with safety rails.
By building out the scaffolding properly, the crew essentially created a temporary working floor about five feet above the main floor, allowing them to work safely and accurately while installing the beams overhead.
Safety and stability are critical for detailed finish carpentry work like this.
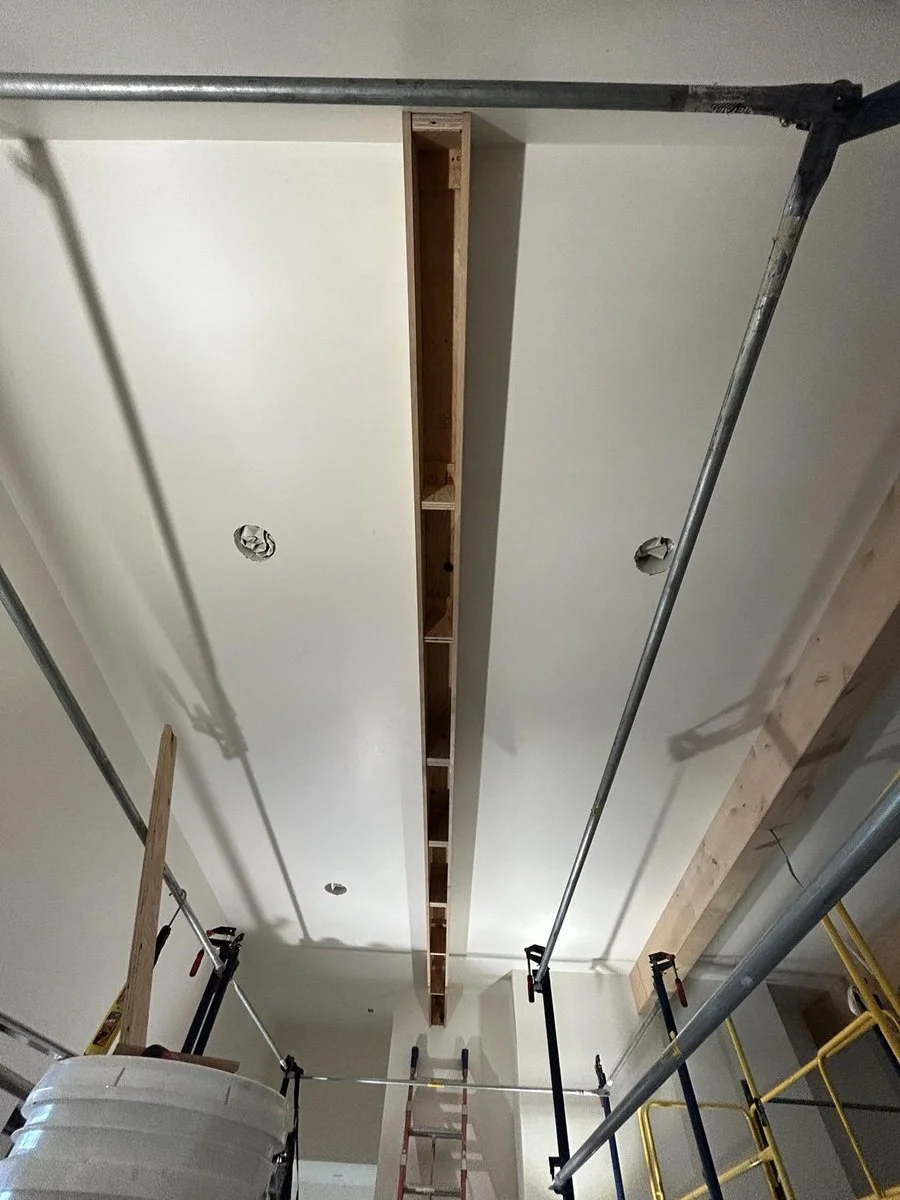
Installing the Beam Backbone
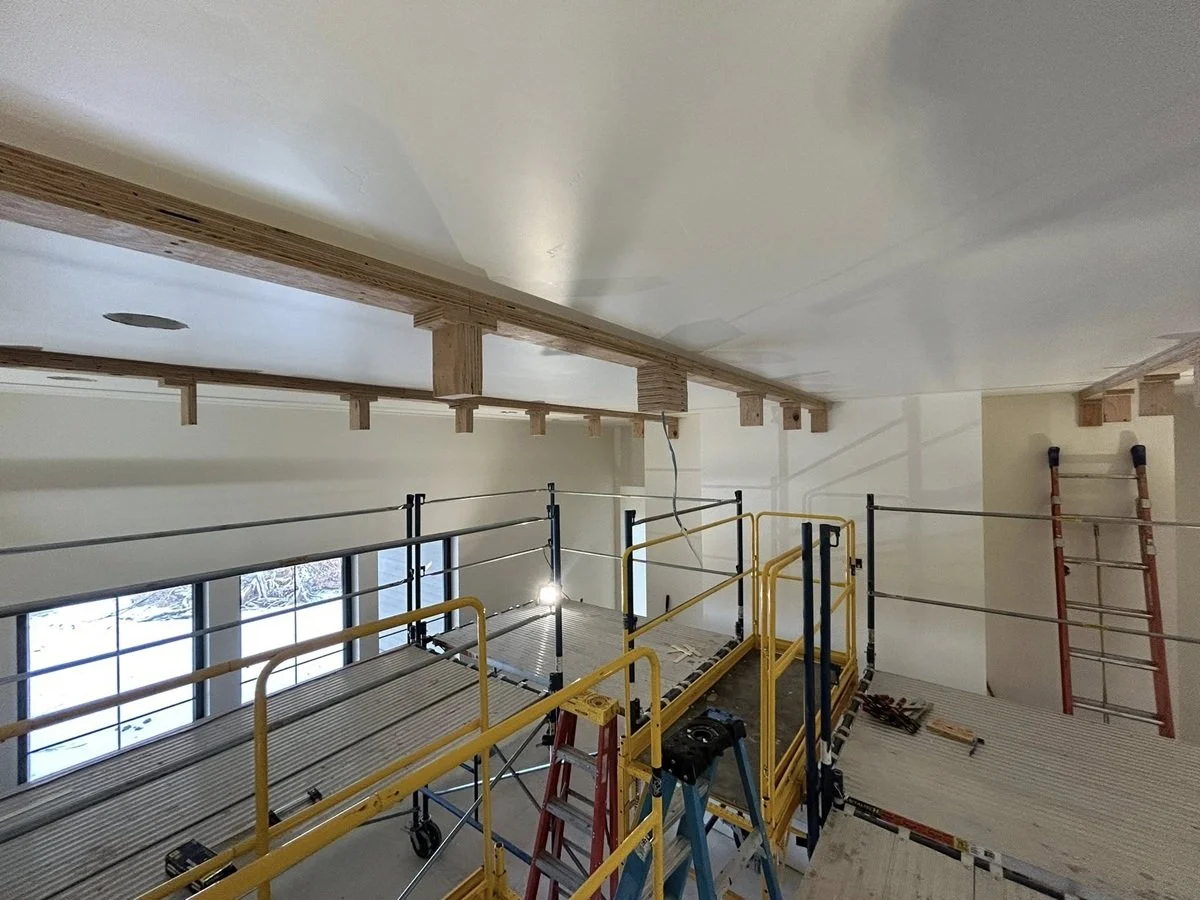

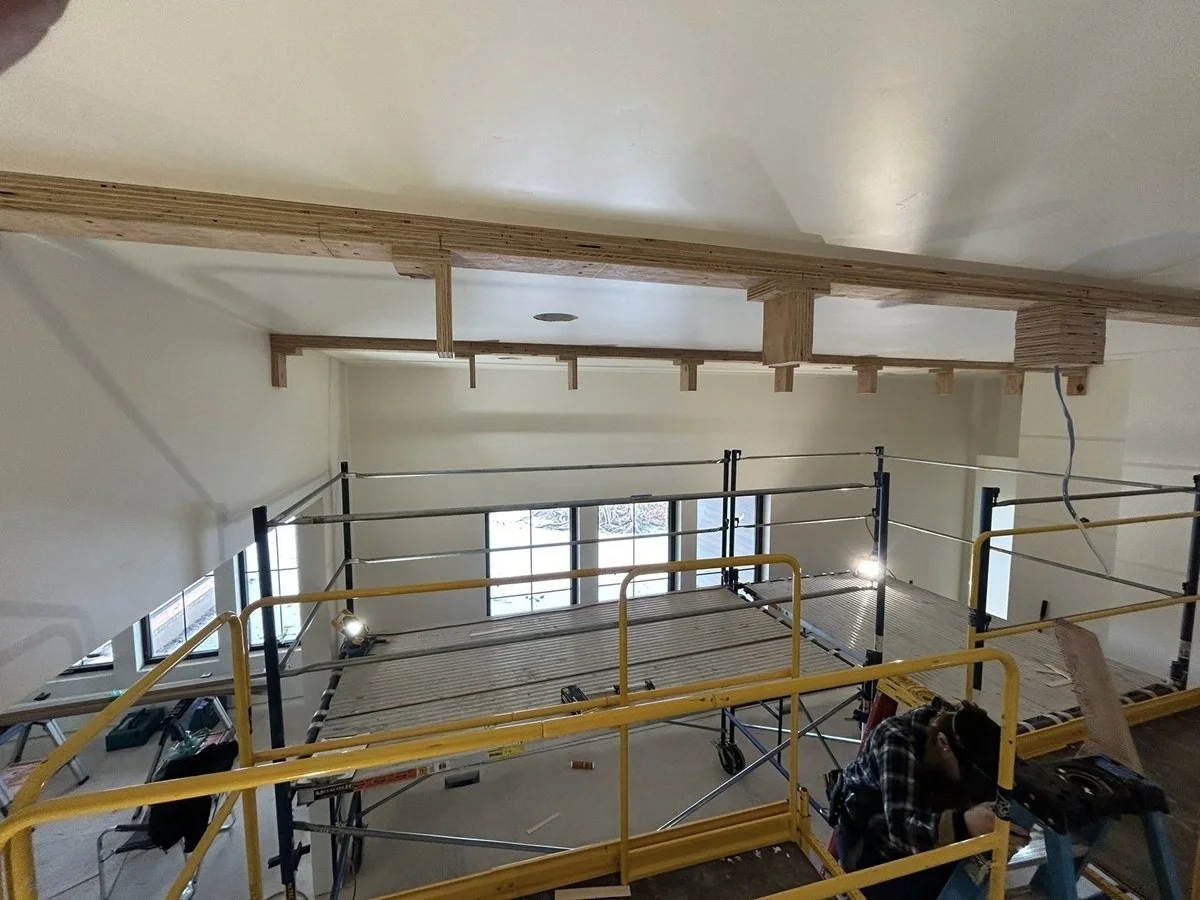
Every false beam system starts with the structural backbone that anchors the beam to the ceiling.
This stage demands precision. The backbone material must be installed perfectly straight, level, and positioned exactly where the beams will sit. Taking the time to ensure accuracy here is essential because it forms the foundation that the entire beam assembly depends on.
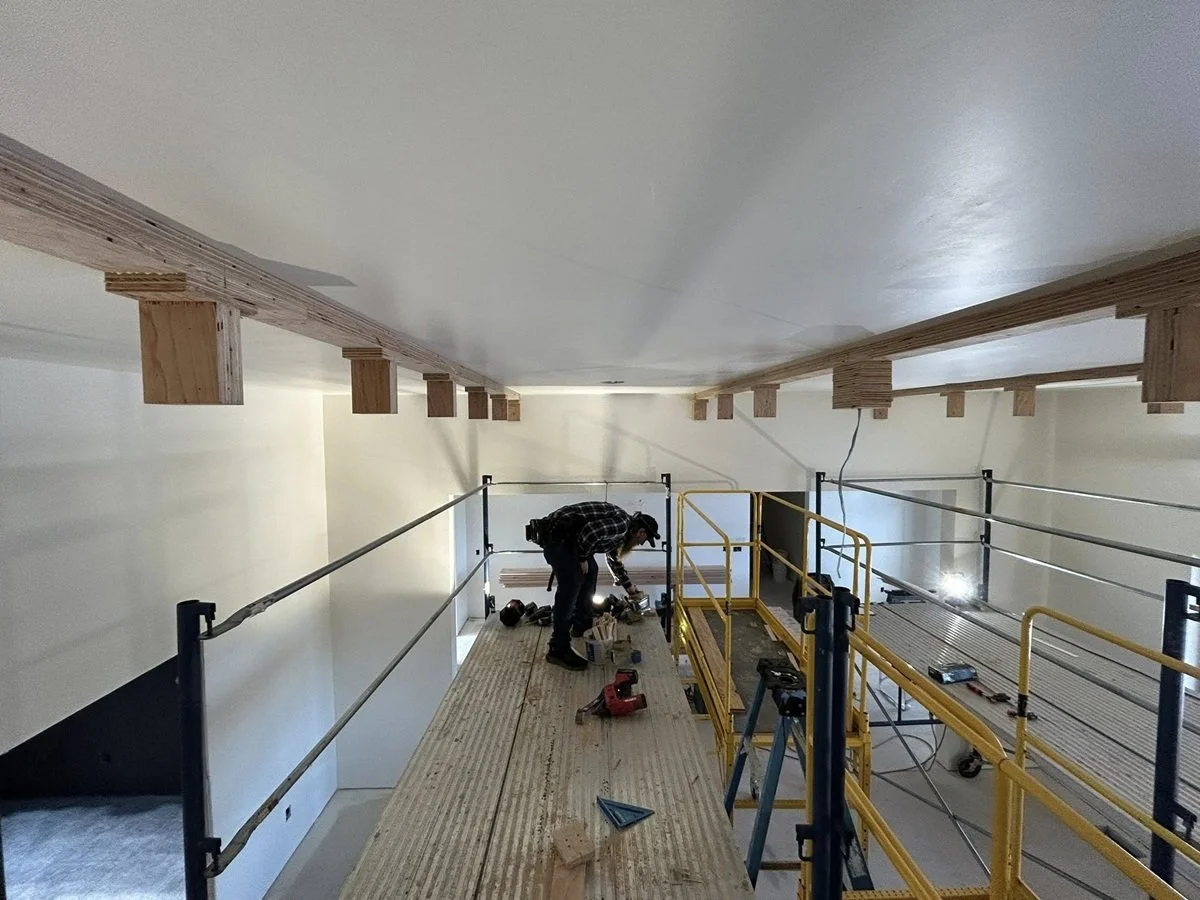
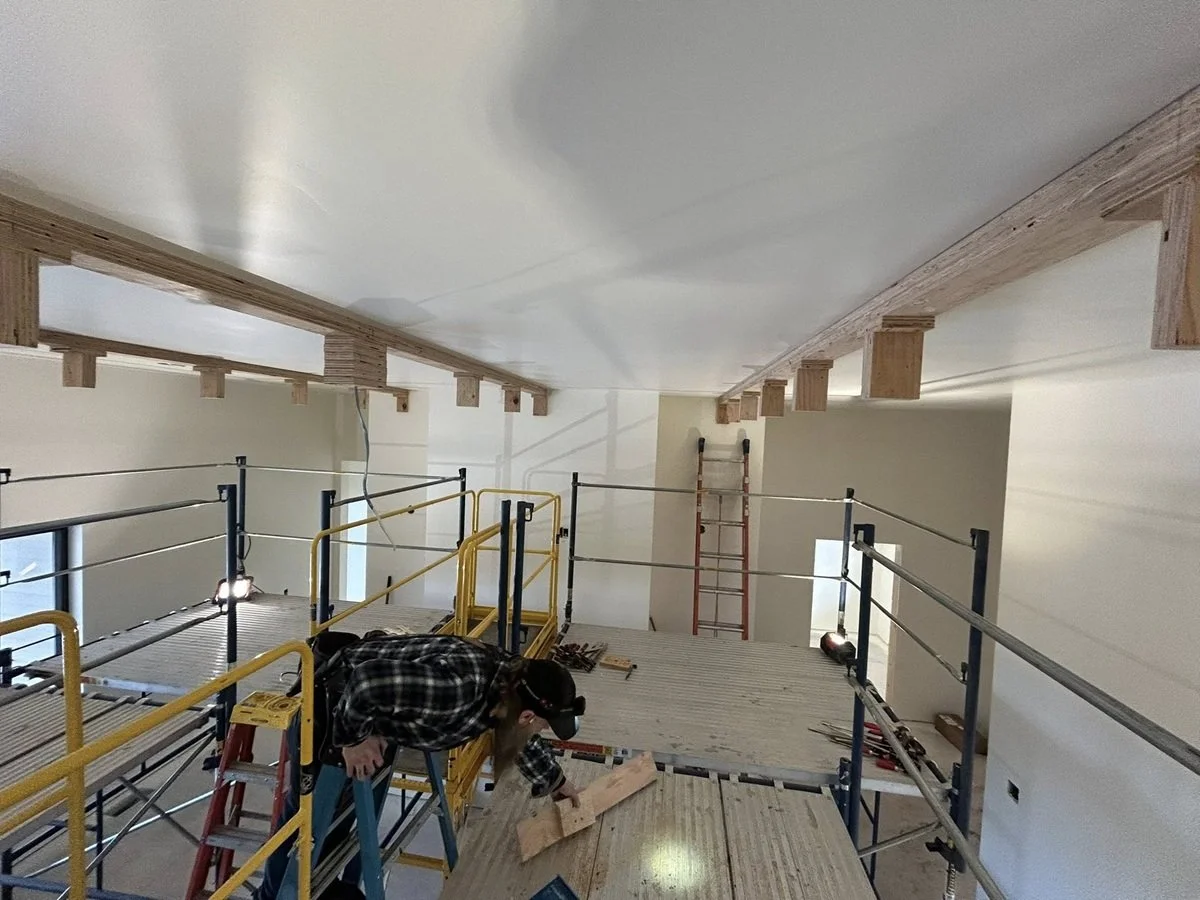
Scribing the Beam Sides to the Ceiling
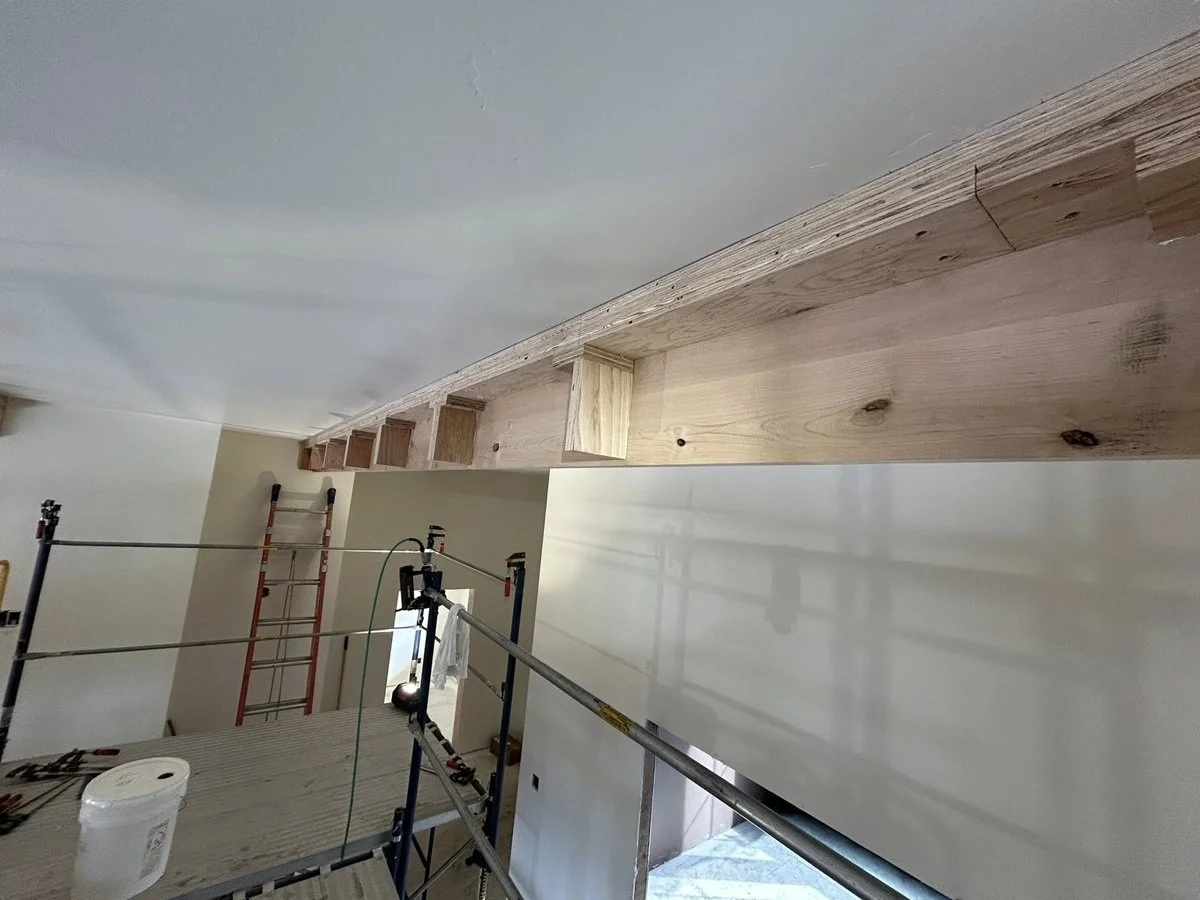

Next comes one of the most important—and most time-consuming—steps: scribing the beam sides to the ceiling.
Even in well-built homes, ceilings are rarely perfectly flat. Lumber moves over time, drywall is finished in layers, and texture adds additional variations. To create a tight, professional fit, each beam side must be carefully scribed and shaped to follow the subtle ups and downs of the ceiling.
On this project, the beams were fitted so precisely that the gap between the wood and drywall is no more than 1/32 of an inch, which is exceptional for beams running 12 feet long.
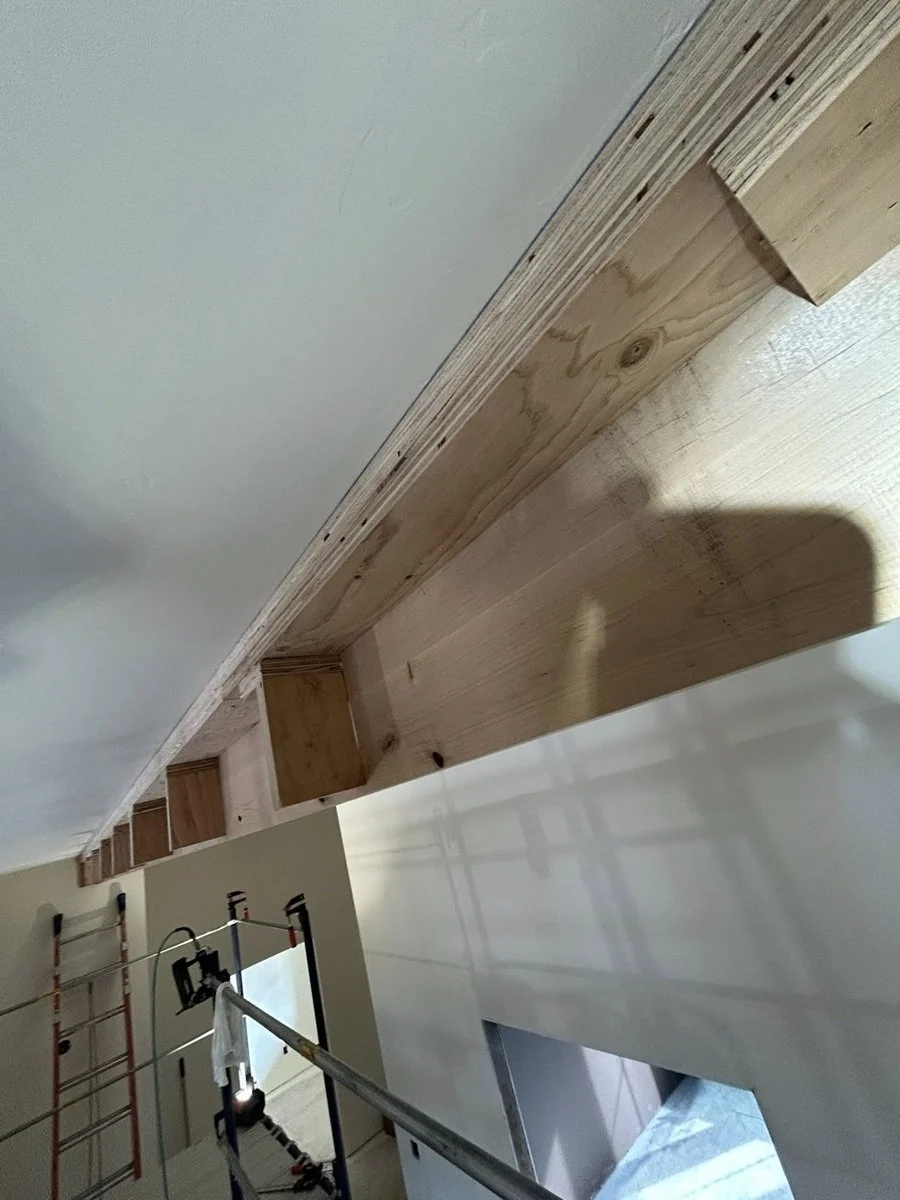
Precision Joinery for Long-Term Stability
Rather than simply butting beam sections together, Frank uses biscuit joinery to strengthen the connections between pieces.
Small plate slots—commonly called biscuits—are cut into each joint. These biscuits are glued into place along with glue applied across the joint surfaces, creating a strong, aligned connection that helps prevent visible seams as the wood naturally expands and contracts over time.
This attention to joinery ensures the beams maintain their appearance for years to come.
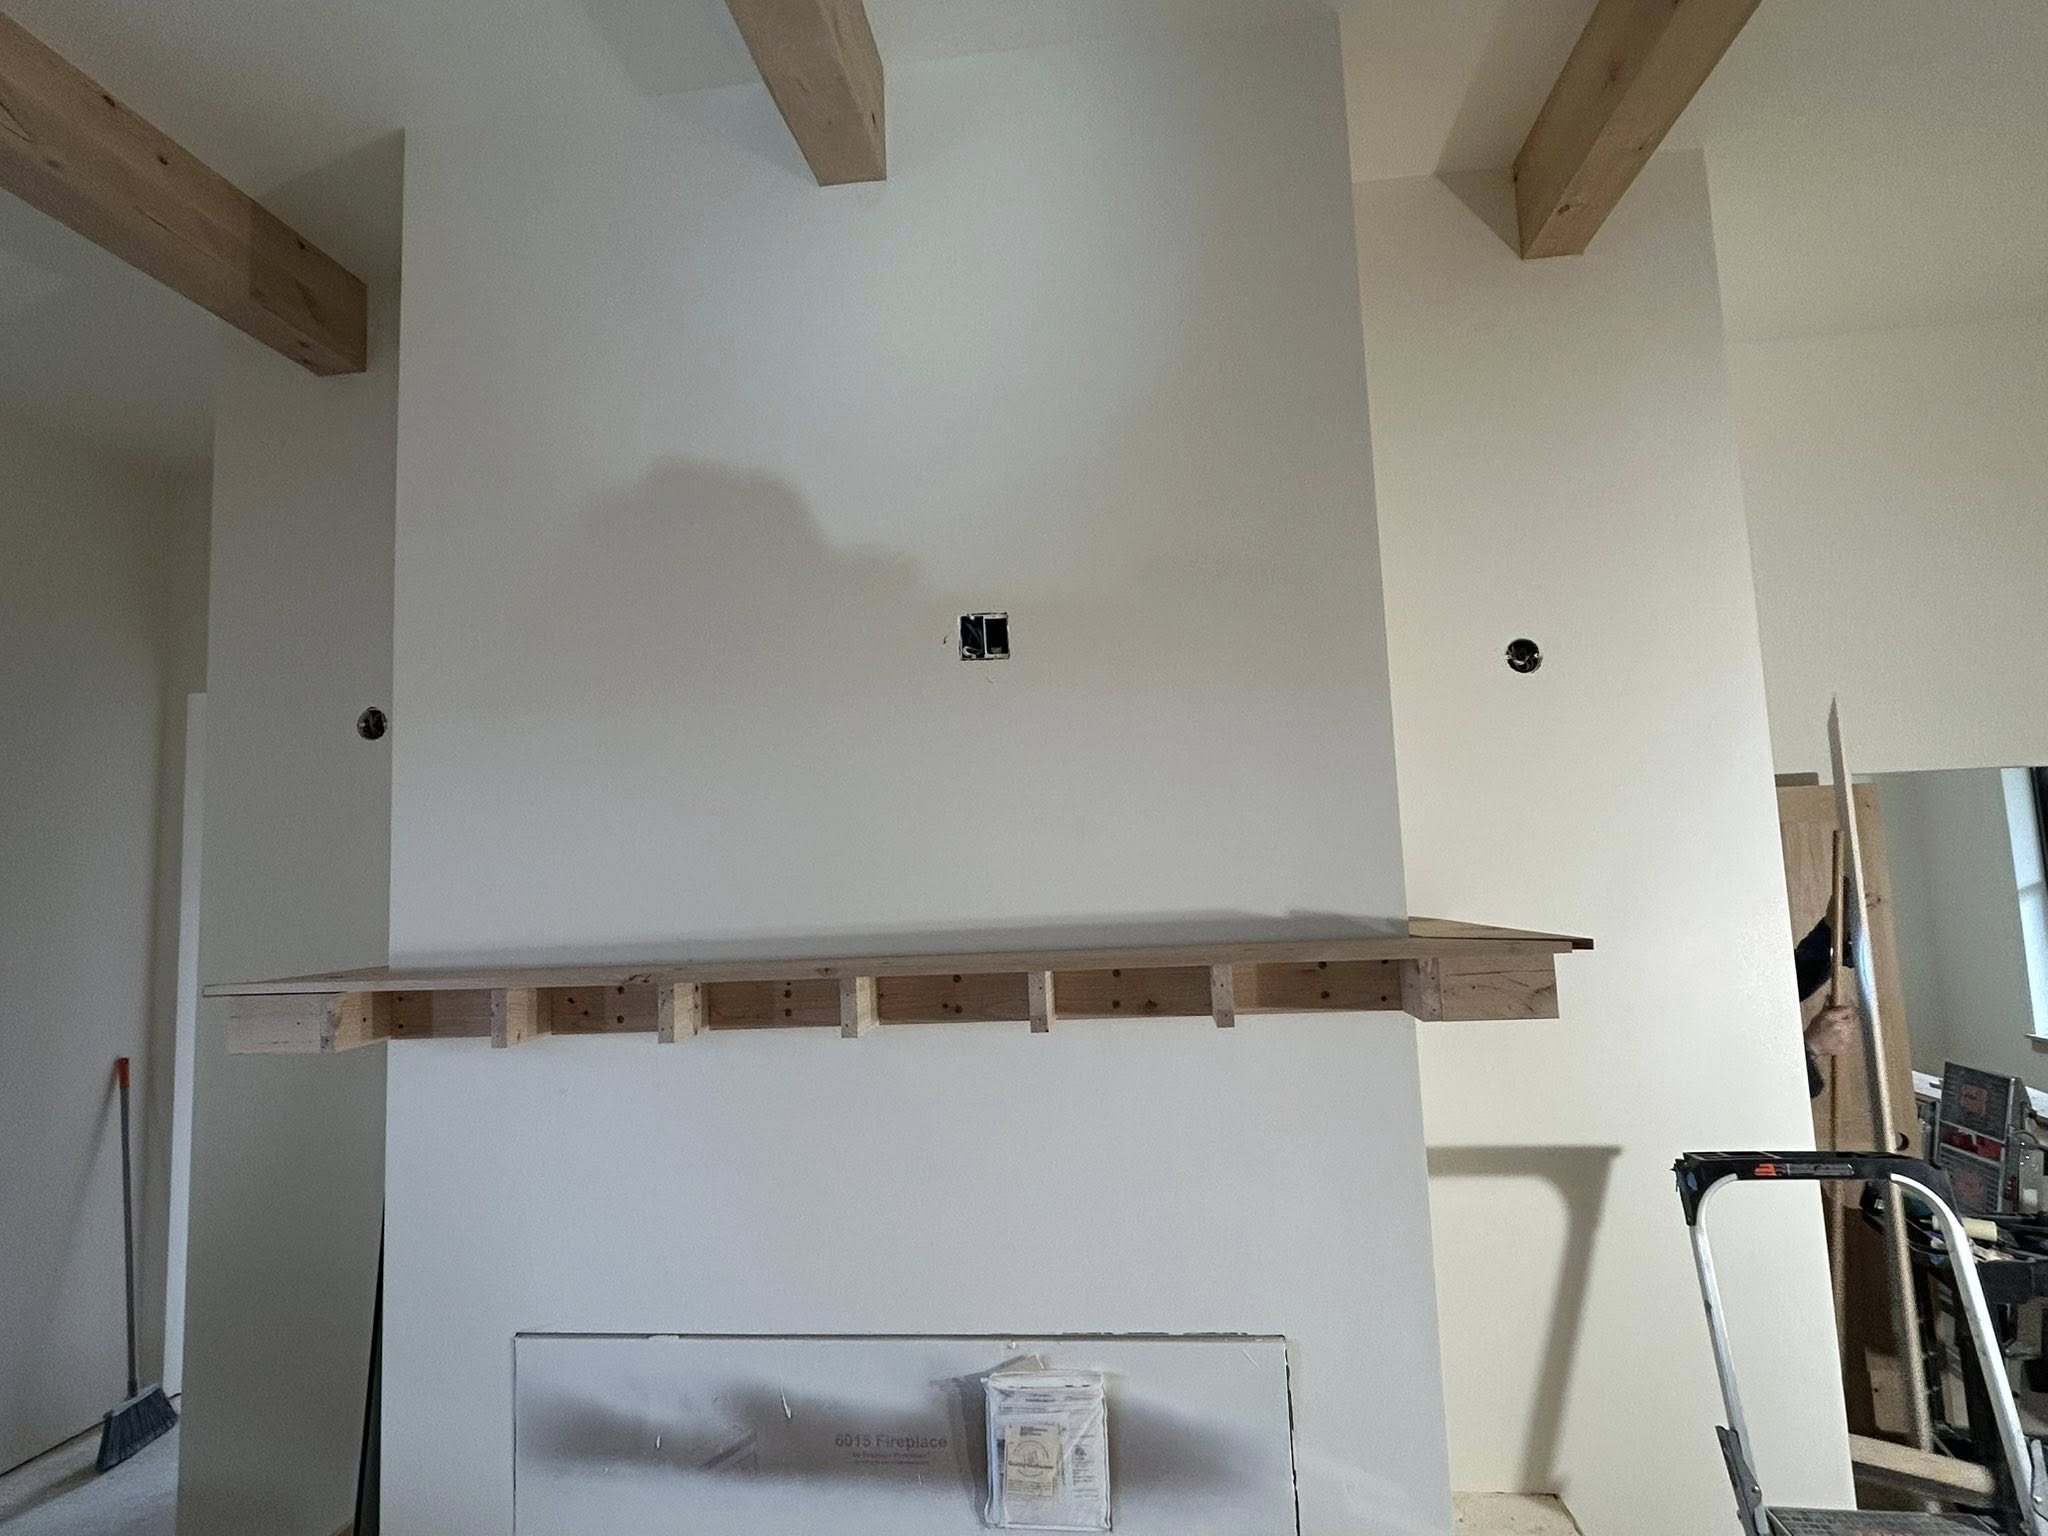
Installing the Bottom Beam Section
Once both sides of the beam are perfectly fitted and leveled, the bottom section of the beam can be installed.
The bottom piece is designed with a slight taper (about one degree) so the joint pulls tight as it is installed. Temporary supports, often called dead men, hold the bottom piece firmly in place while it is secured, ensuring there are no gaps between the sides and the bottom of the beam.
Final Shaping and Finishing Preparation
With the beam structure complete, the finishing process begins.
Each beam is:
Sanded thoroughly
Nail holes and small imperfections are filled
Sanded again for a smooth finish
Rounded over and hand-shaped where the beams meet the walls
Once this process is complete, the beams are ready for the painter to apply stain and finish.
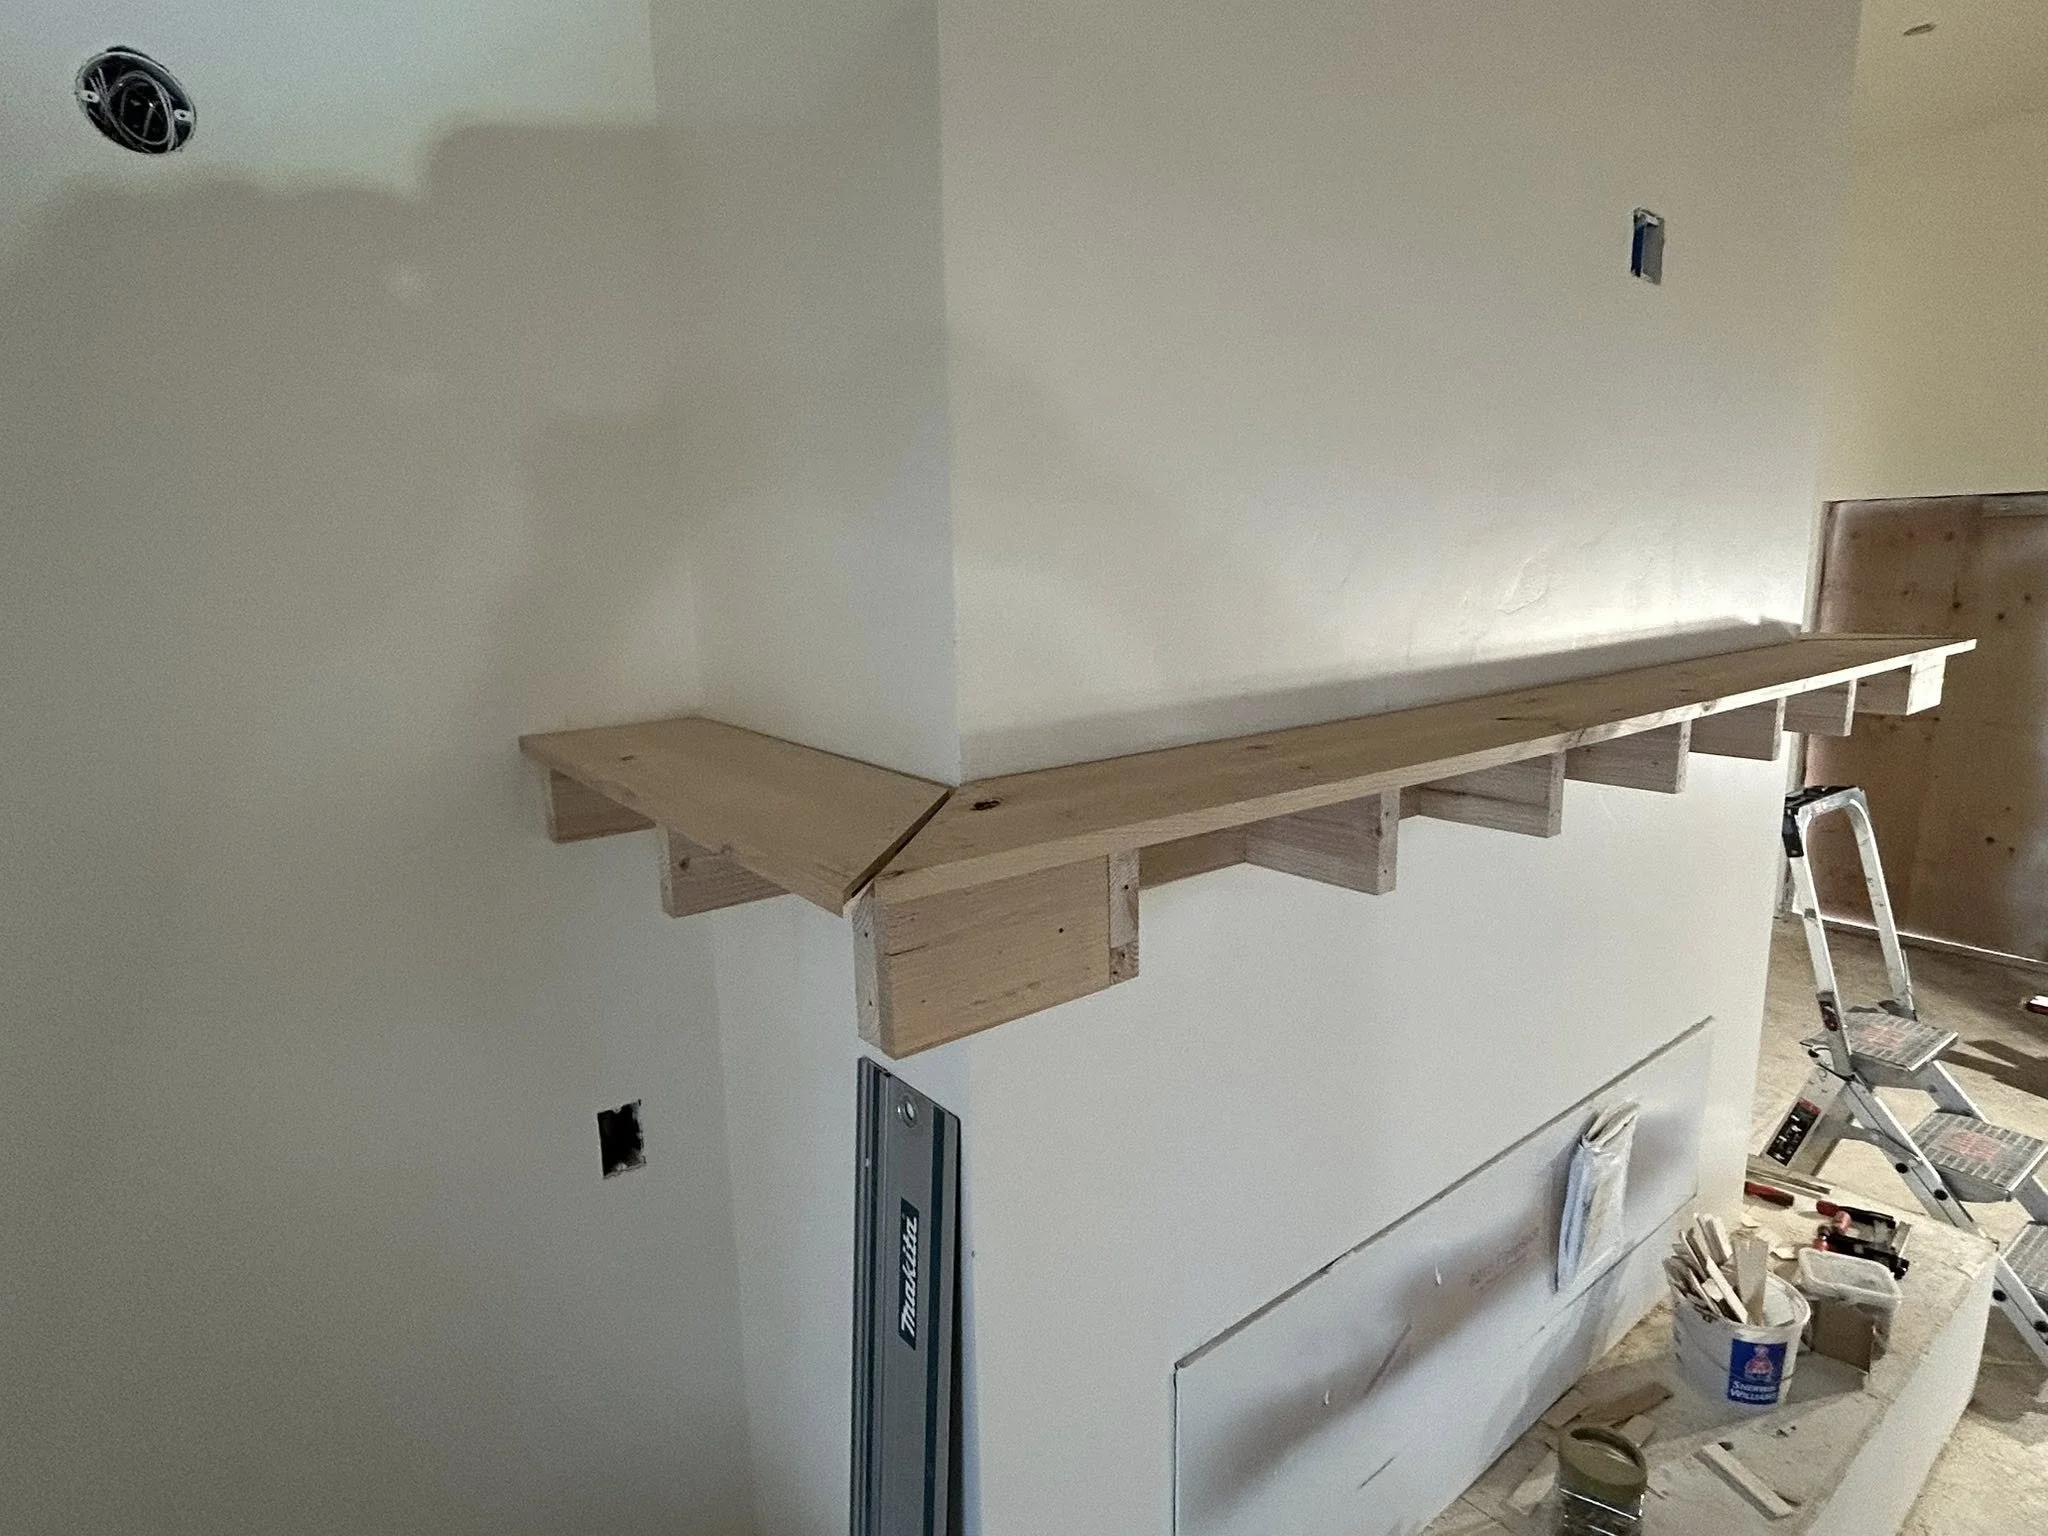
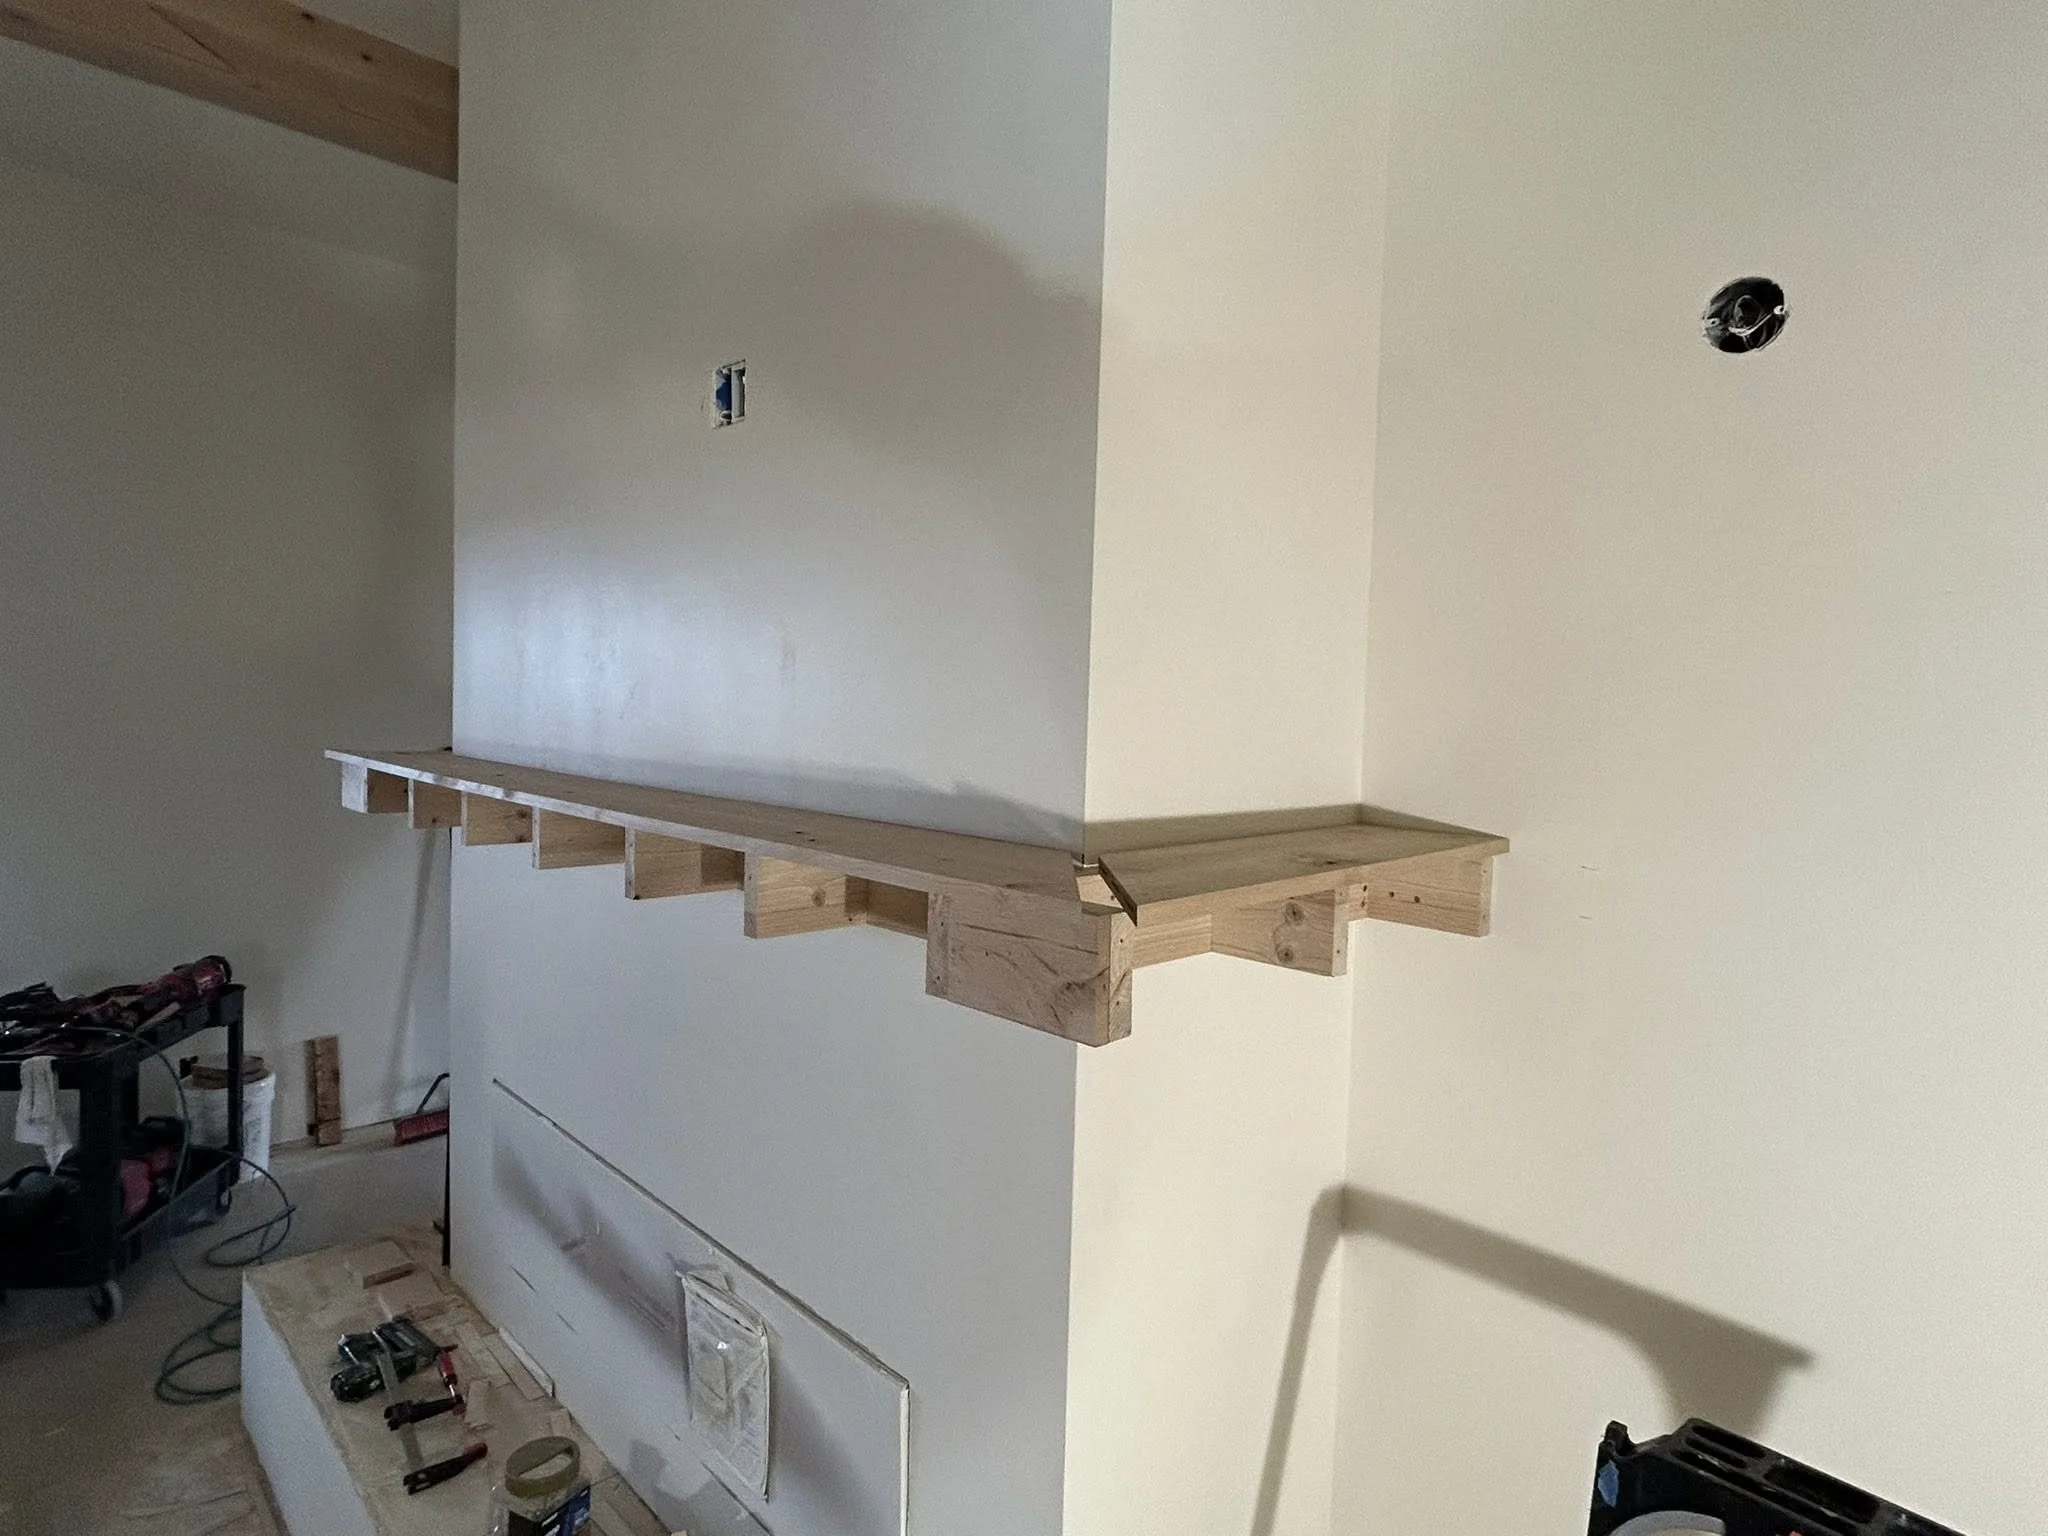
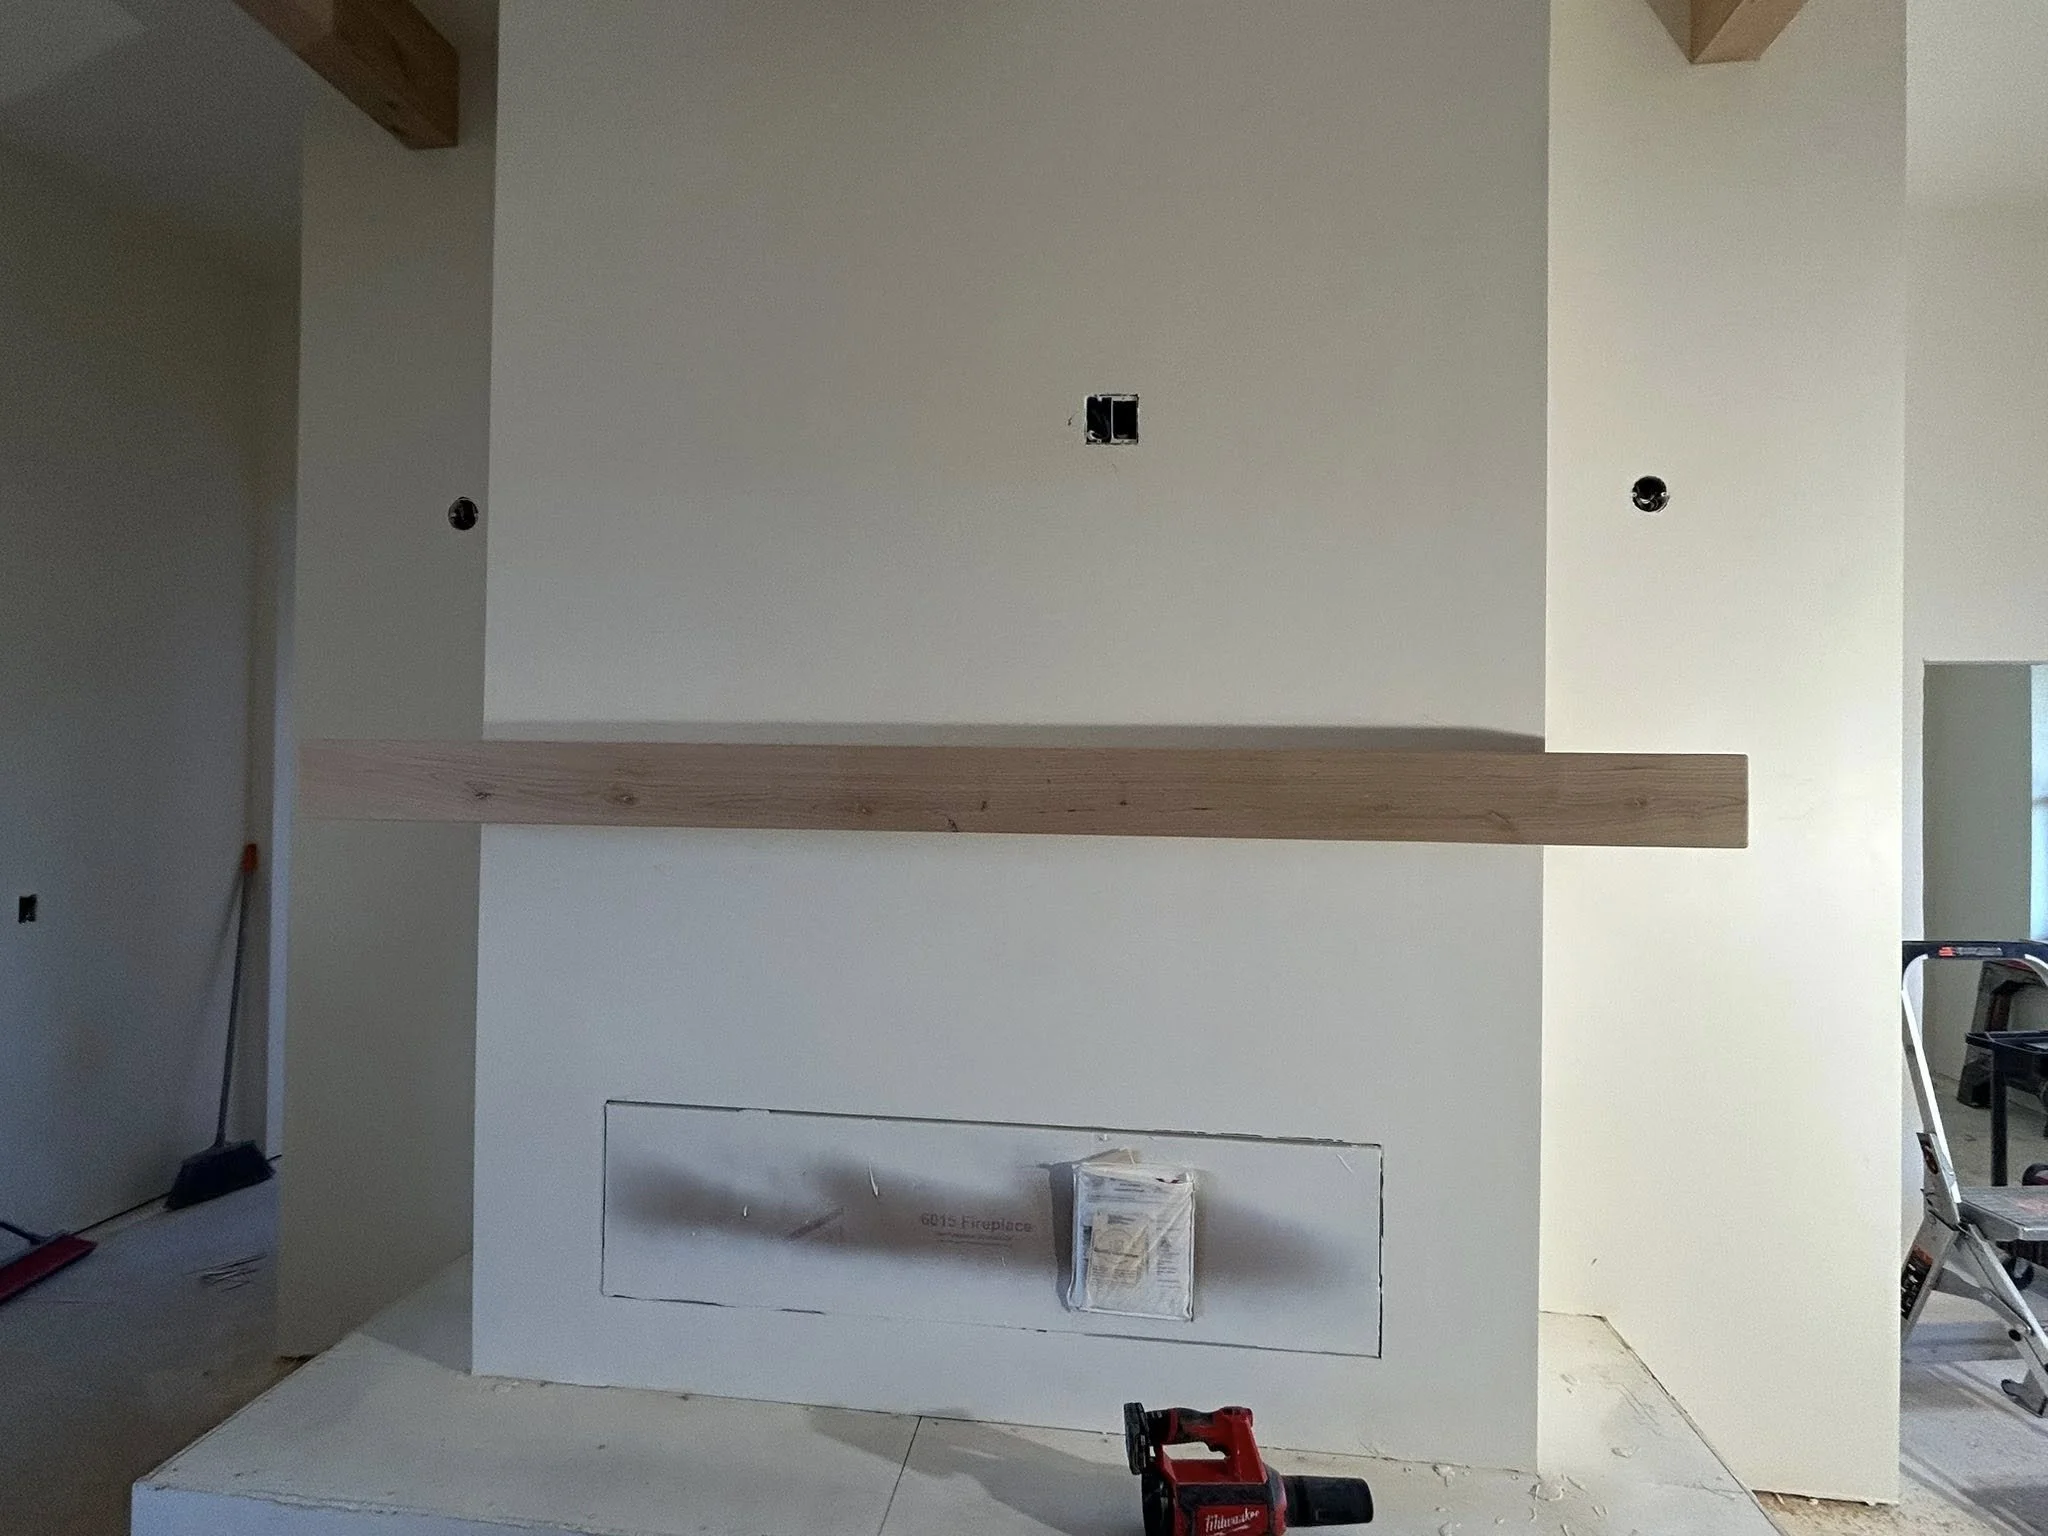
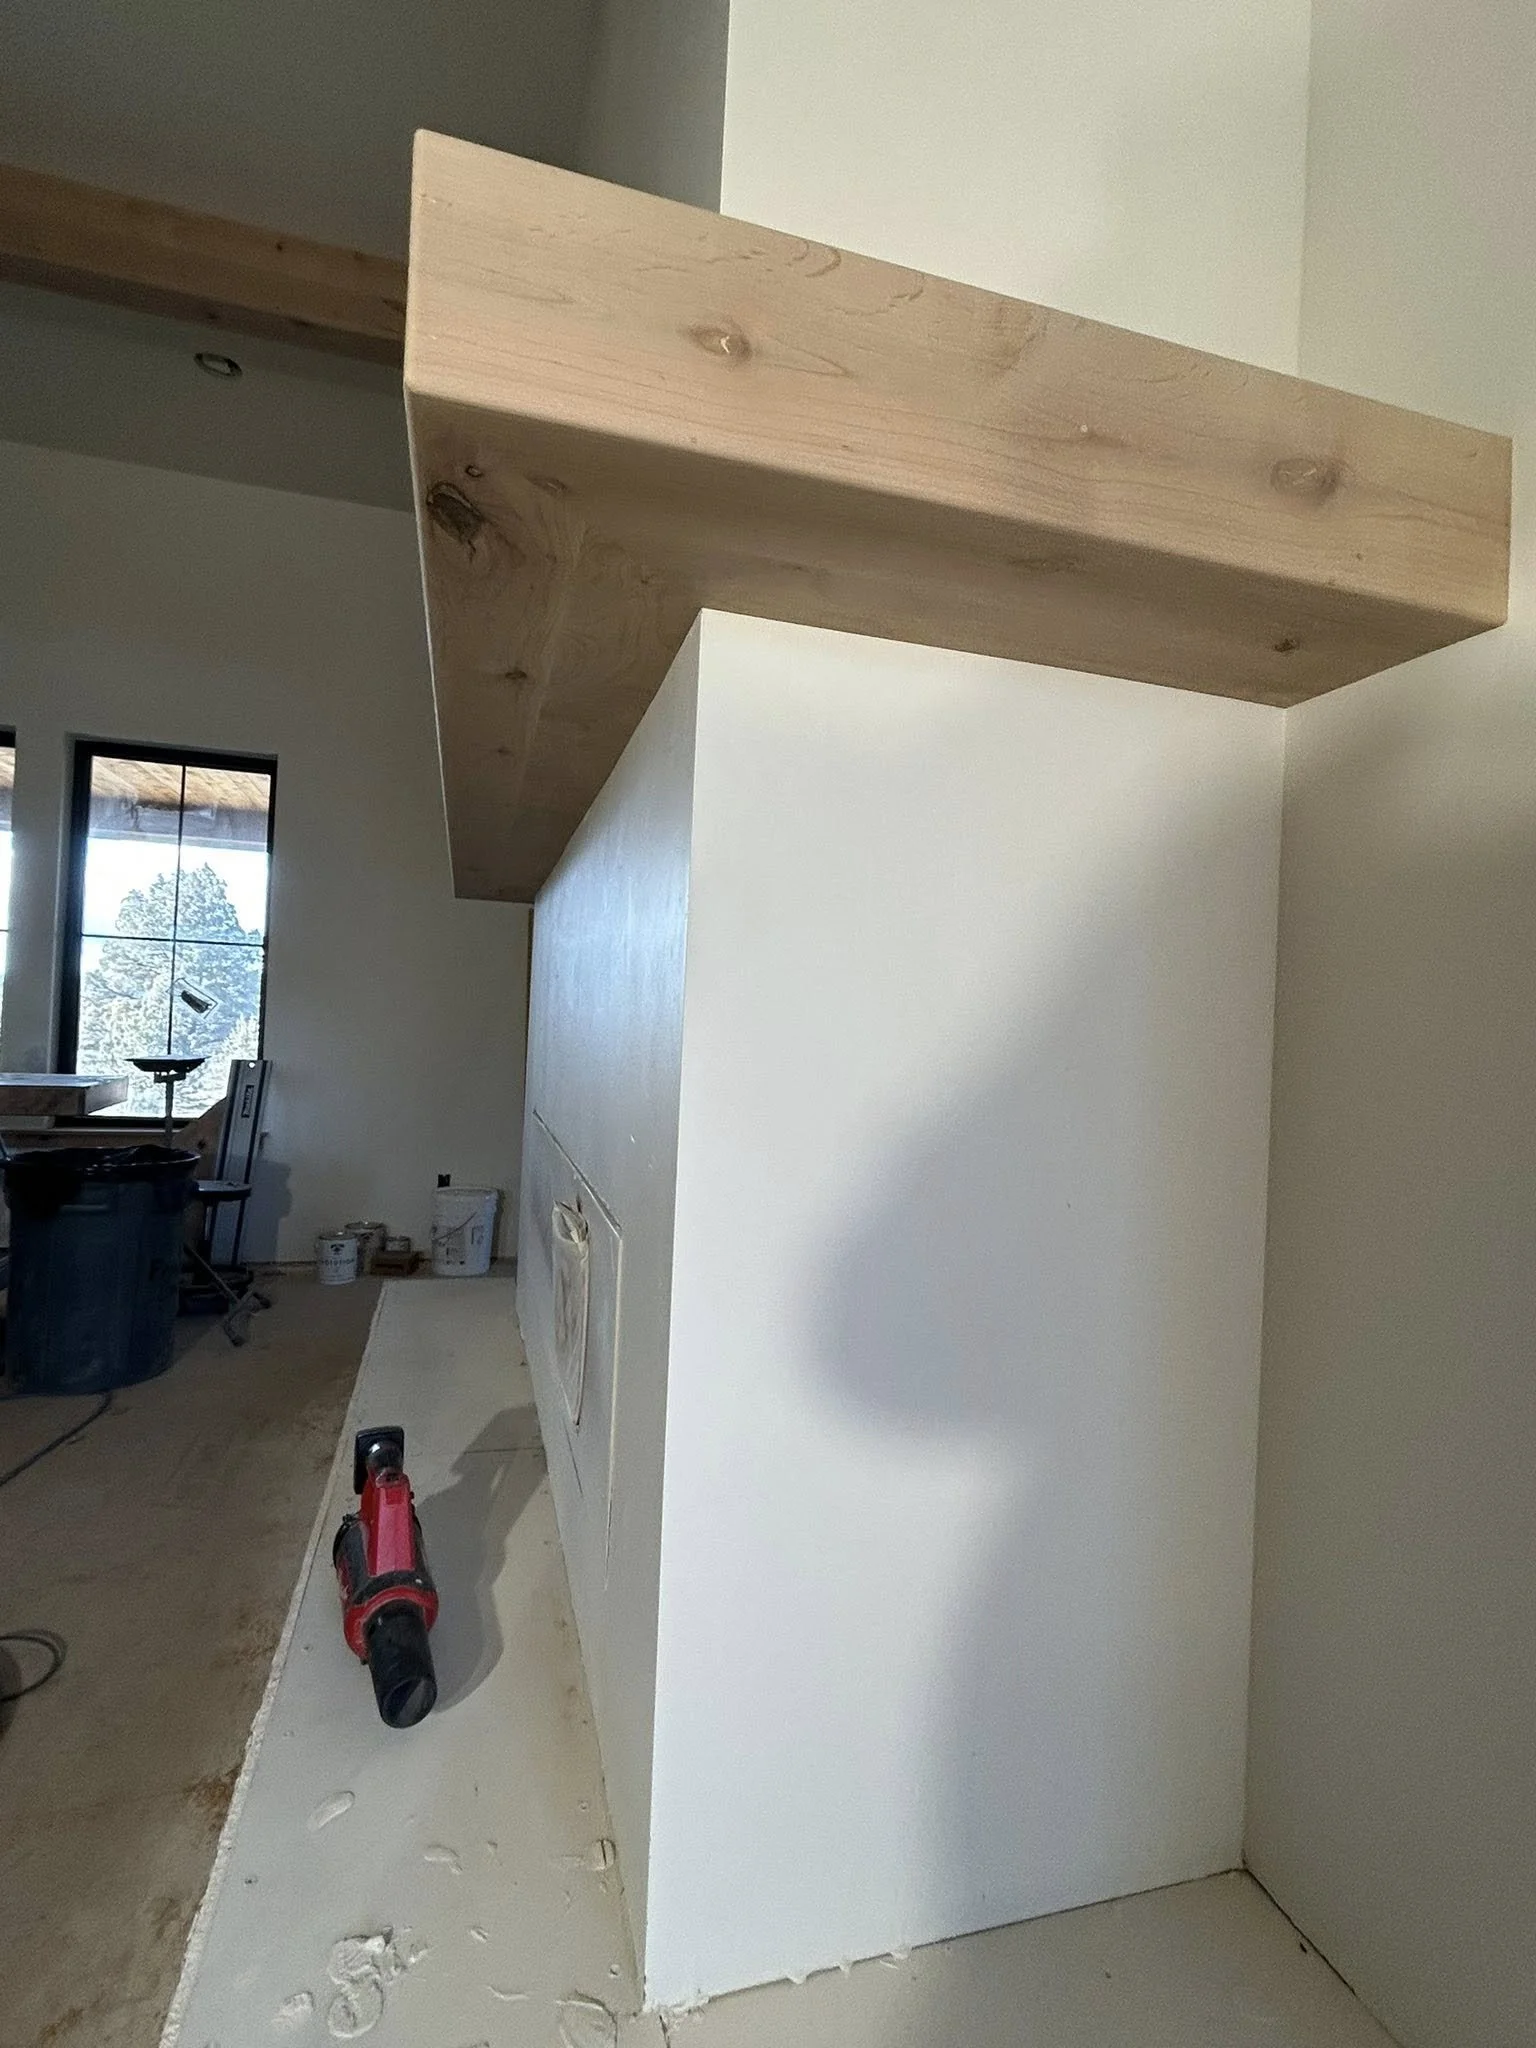
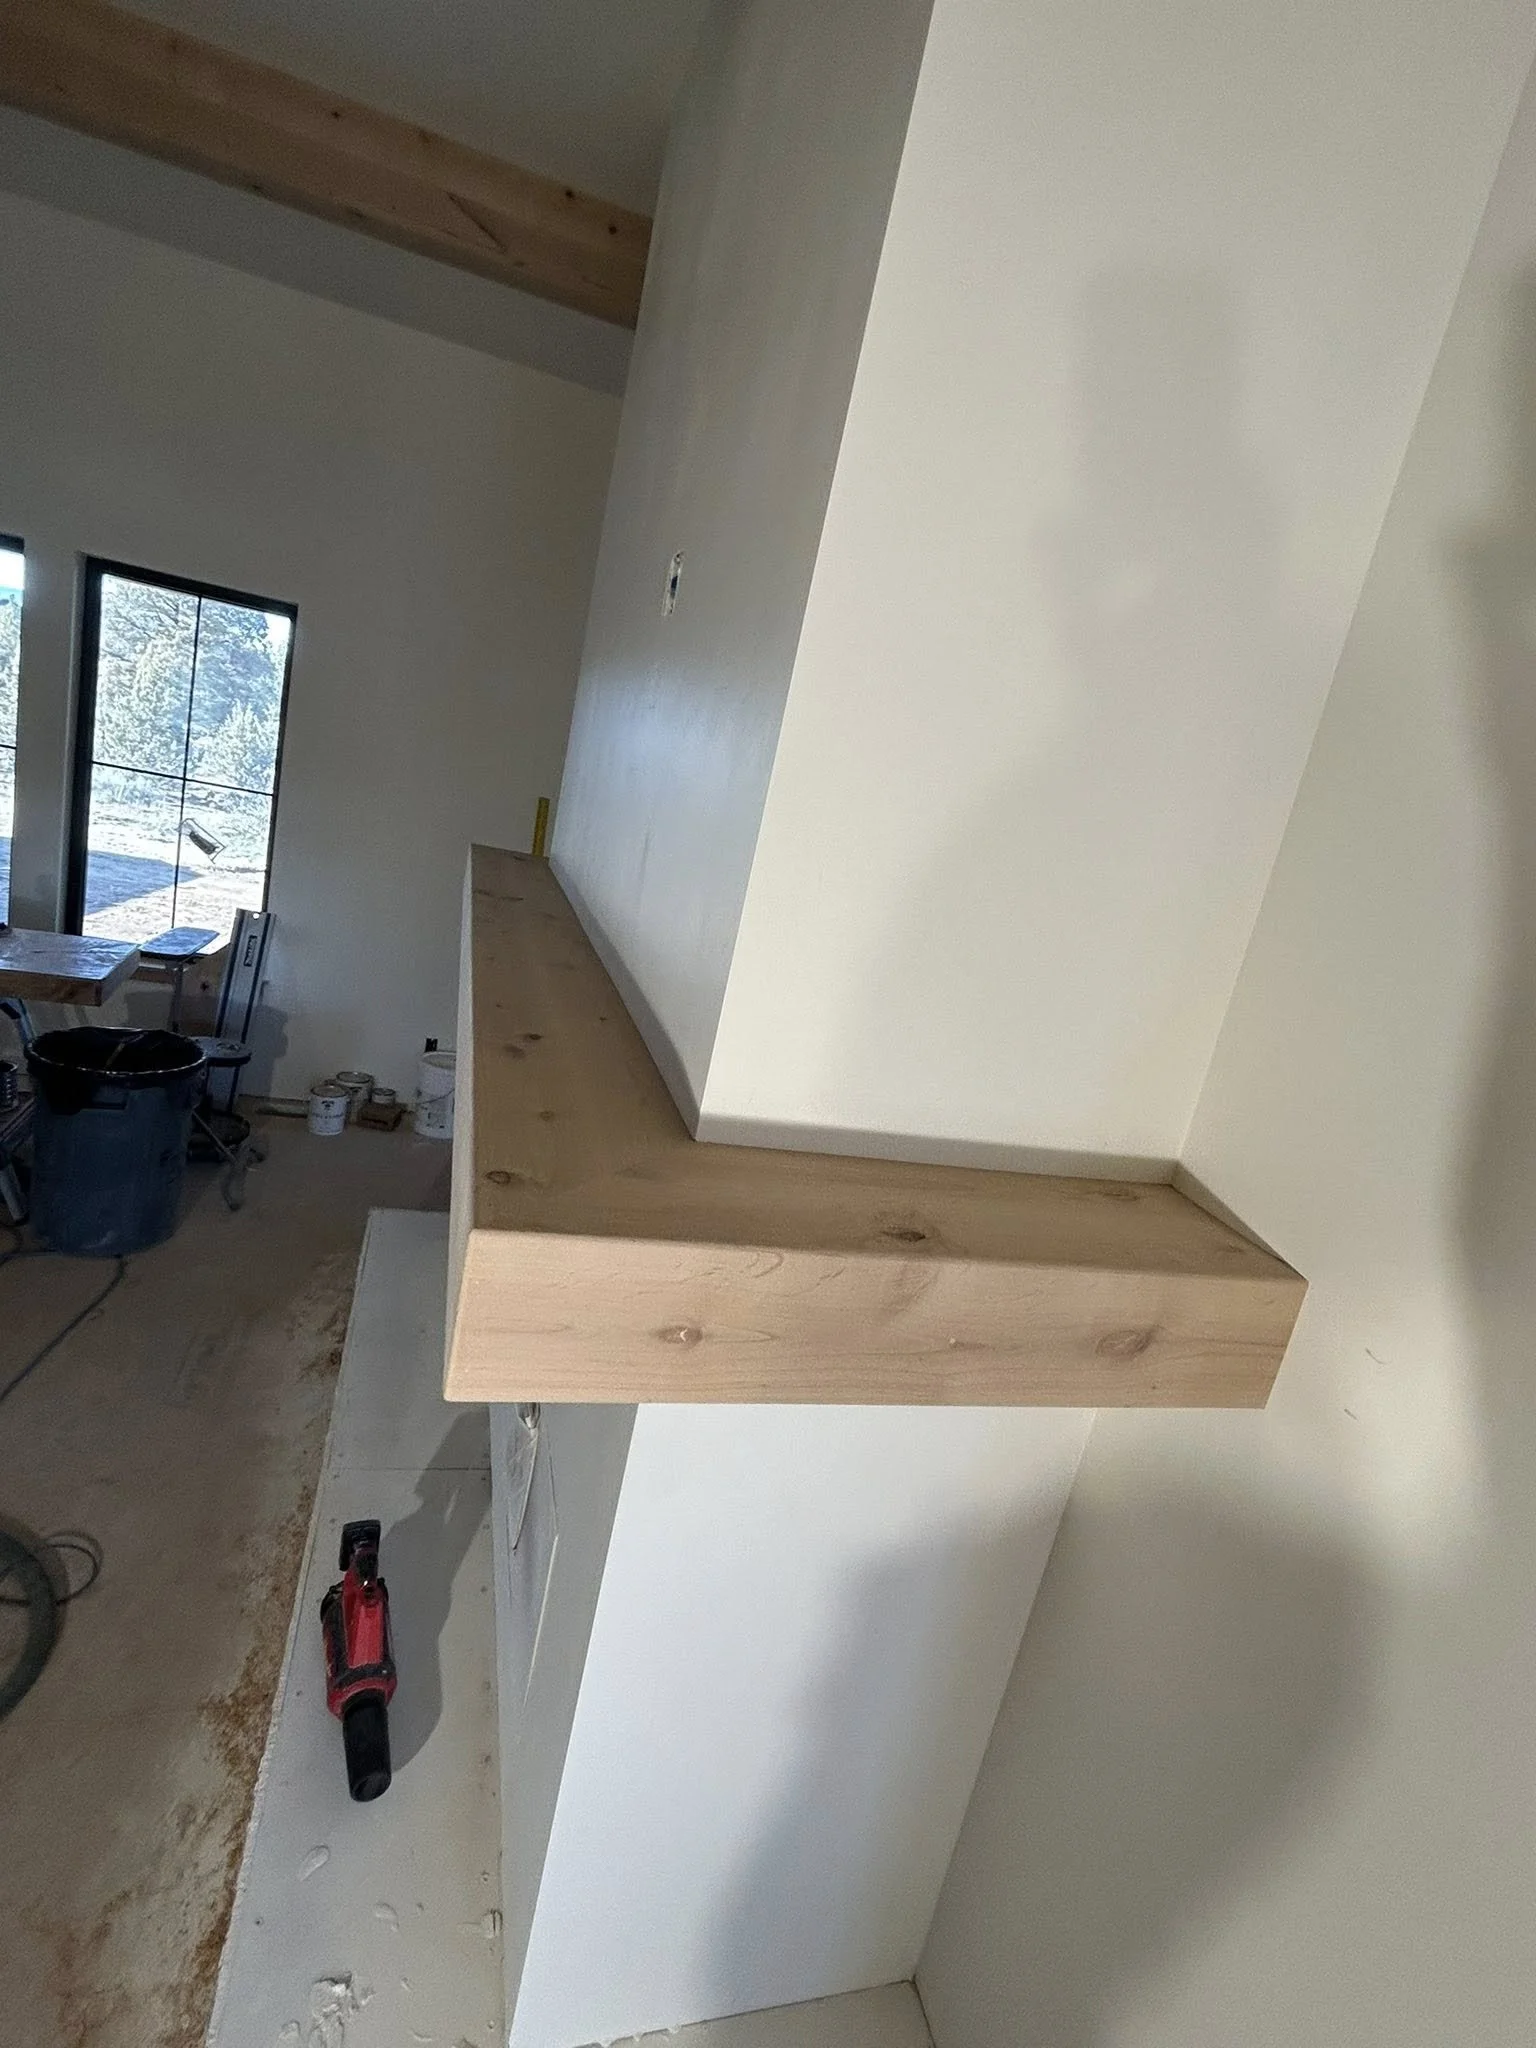
Custom Wrap-Around Fireplace Mantel
In the same home, Frank also built a custom wrap-around fireplace mantel designed to complement the ceiling beams.
The mantel begins with a carefully prepared backbone made from kiln-dried hemlock/fir, sourced locally. To ensure perfectly straight components, each board is first trimmed to establish a straight edge, then glued together in pairs.


After the glue cures overnight, the pieces are:
Planed smooth
Brought to parallel surfaces
Ripped into perfectly straight structural components
This process creates a solid foundation for the mantel.
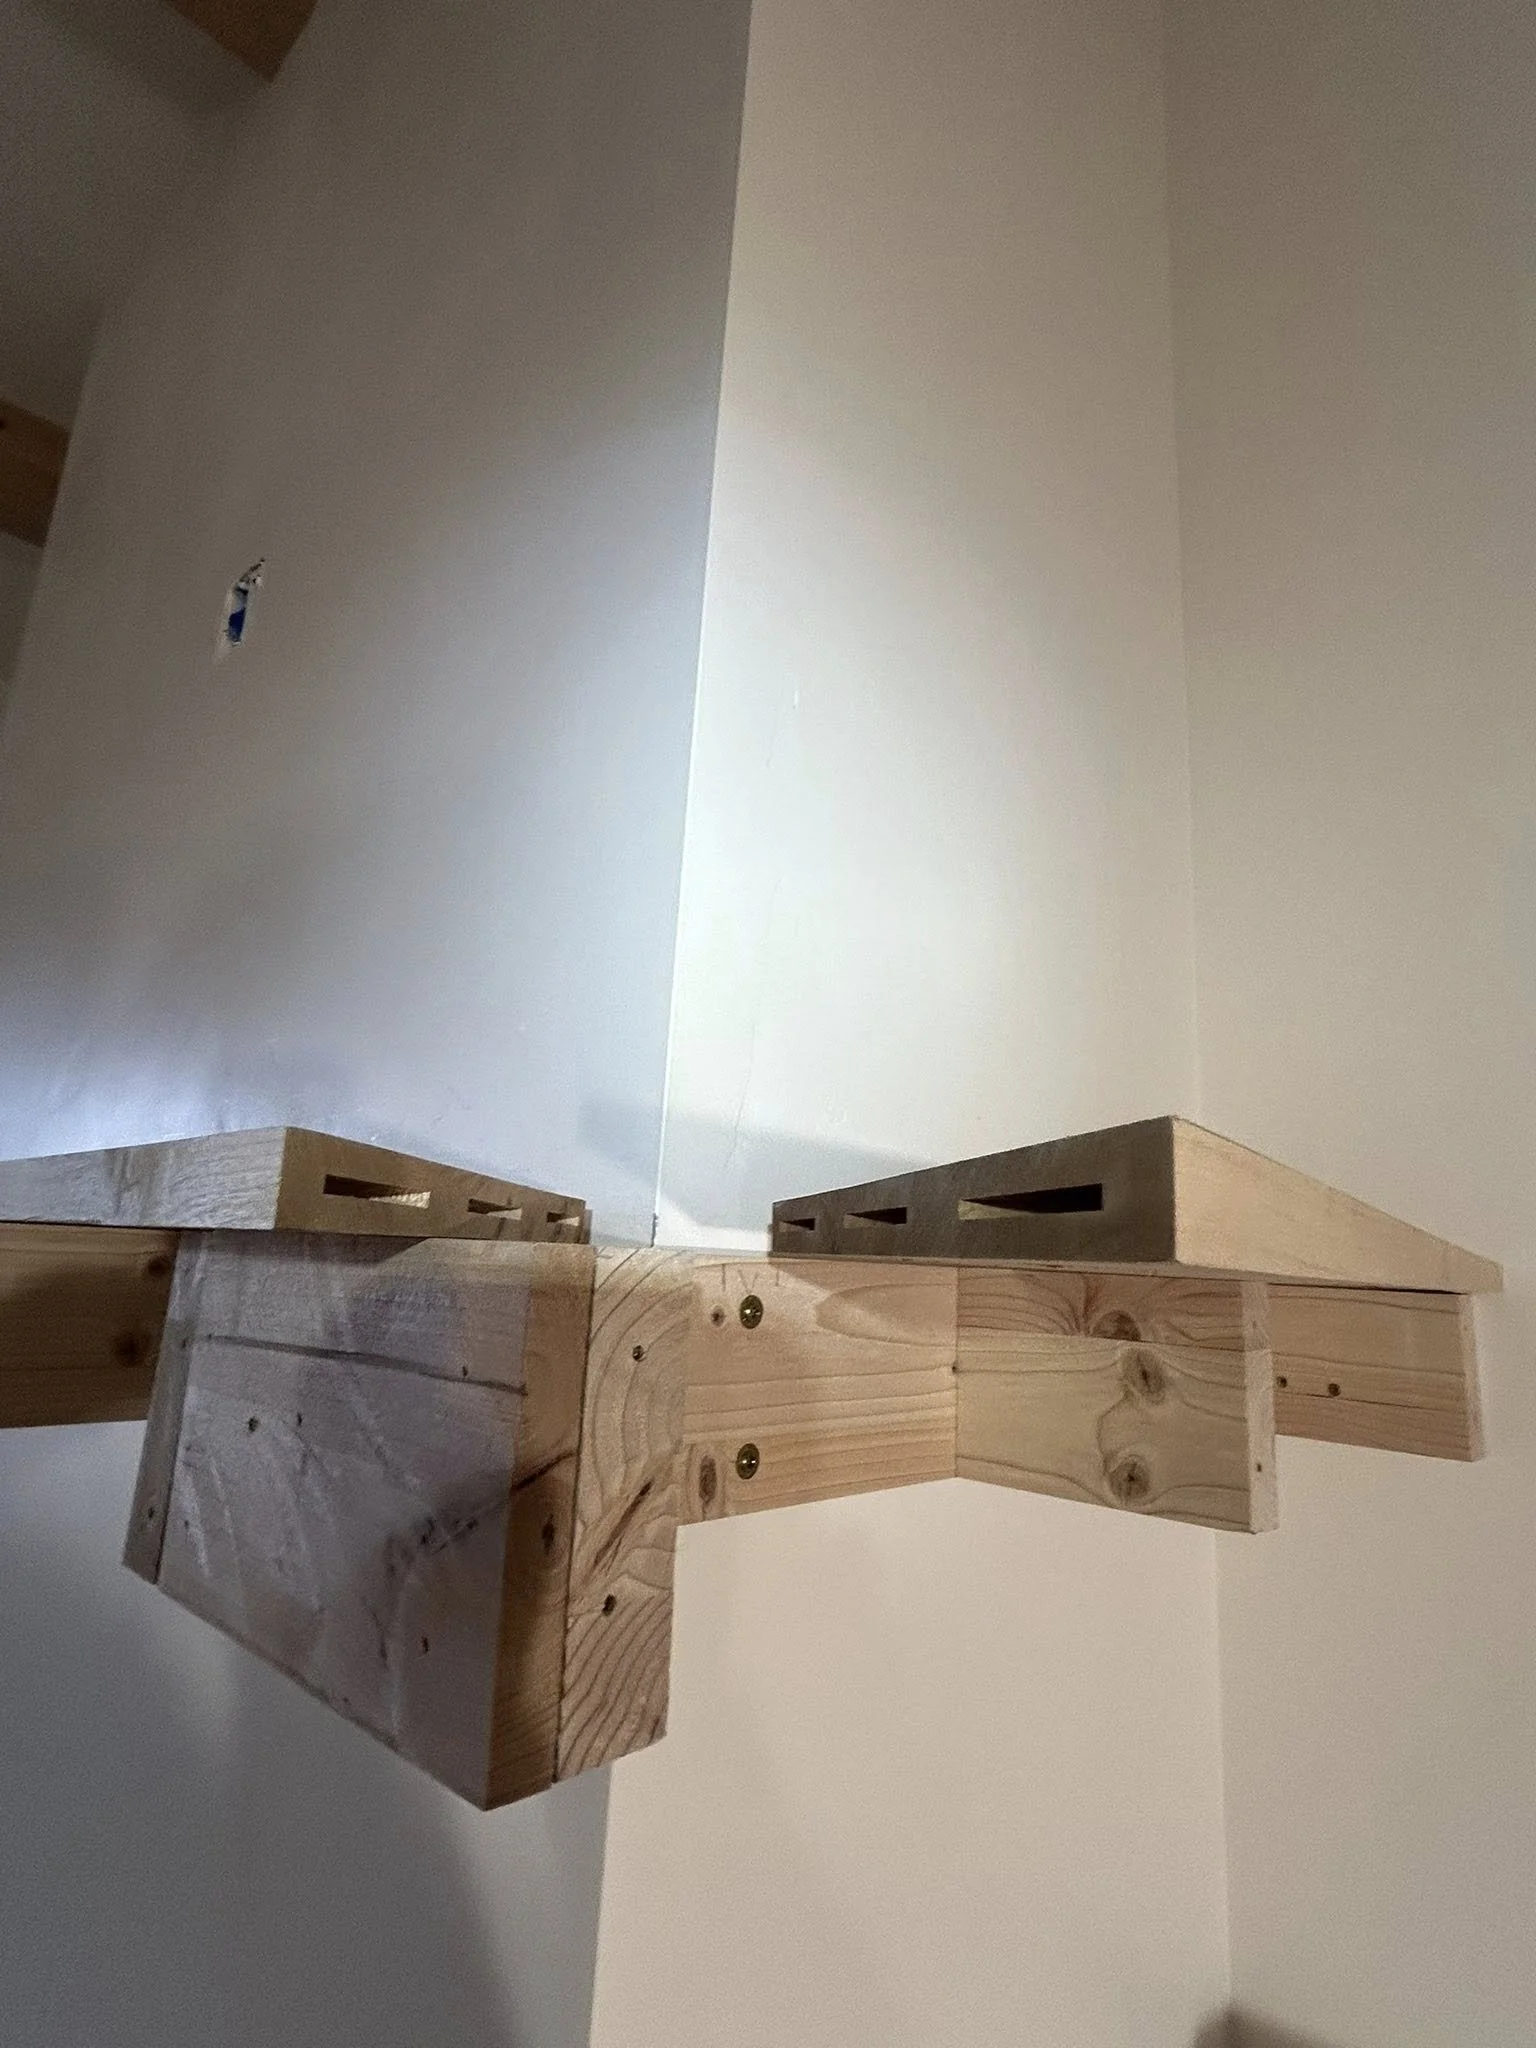
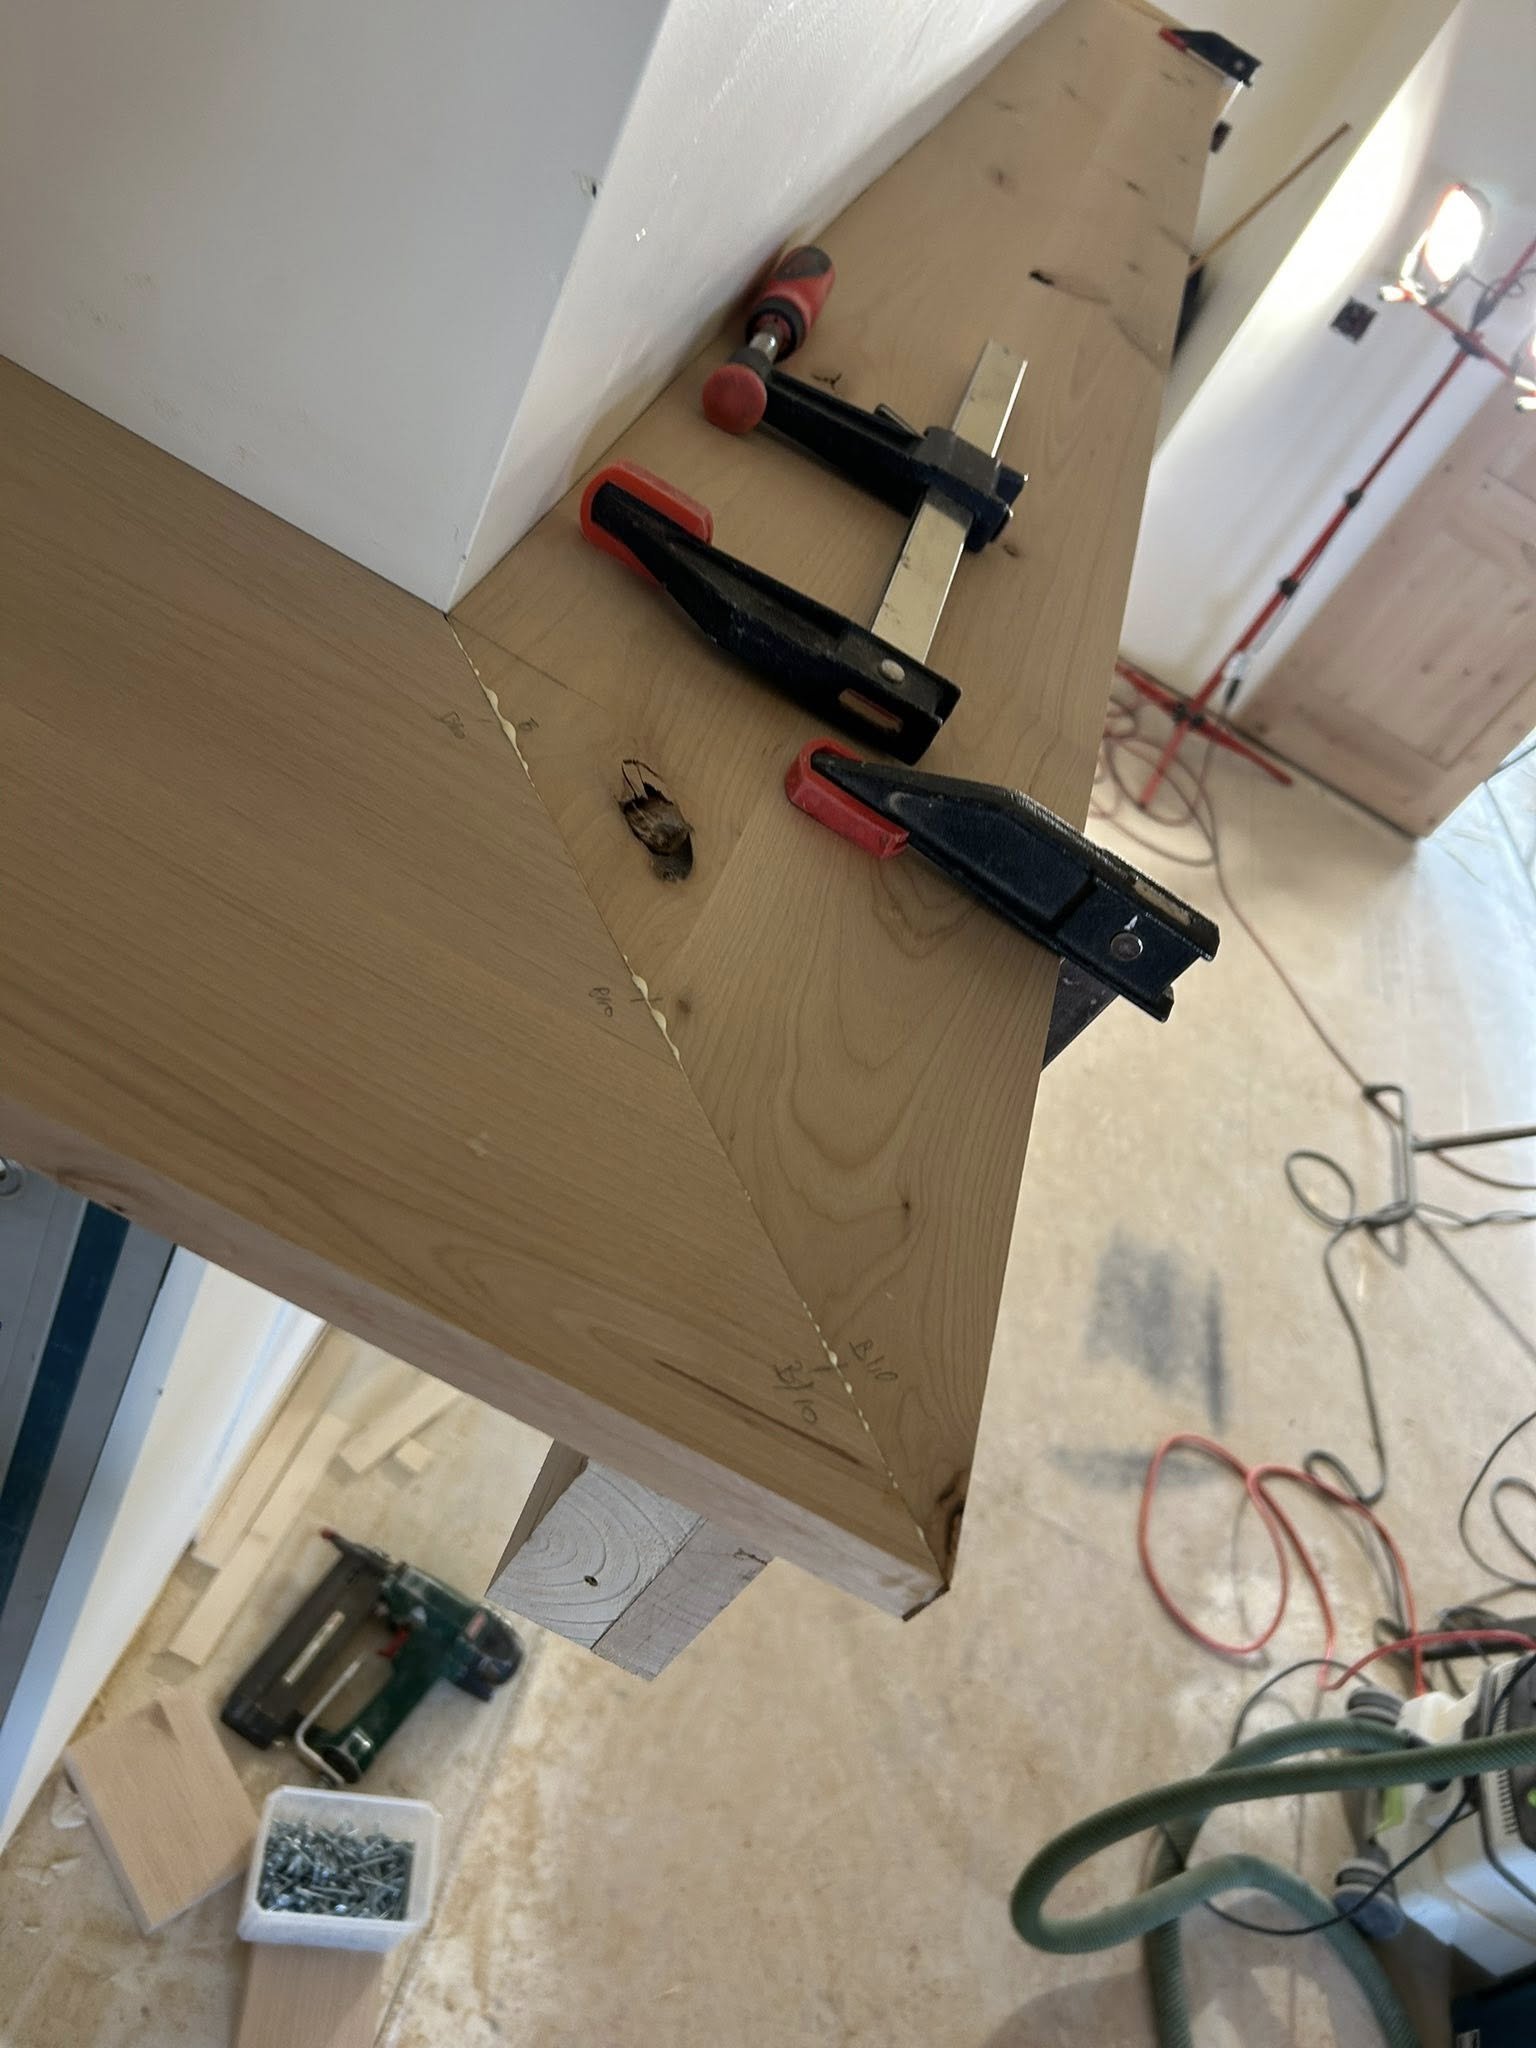
Joinery That Lasts
As with the beams, the mantel construction focuses heavily on strong joinery.
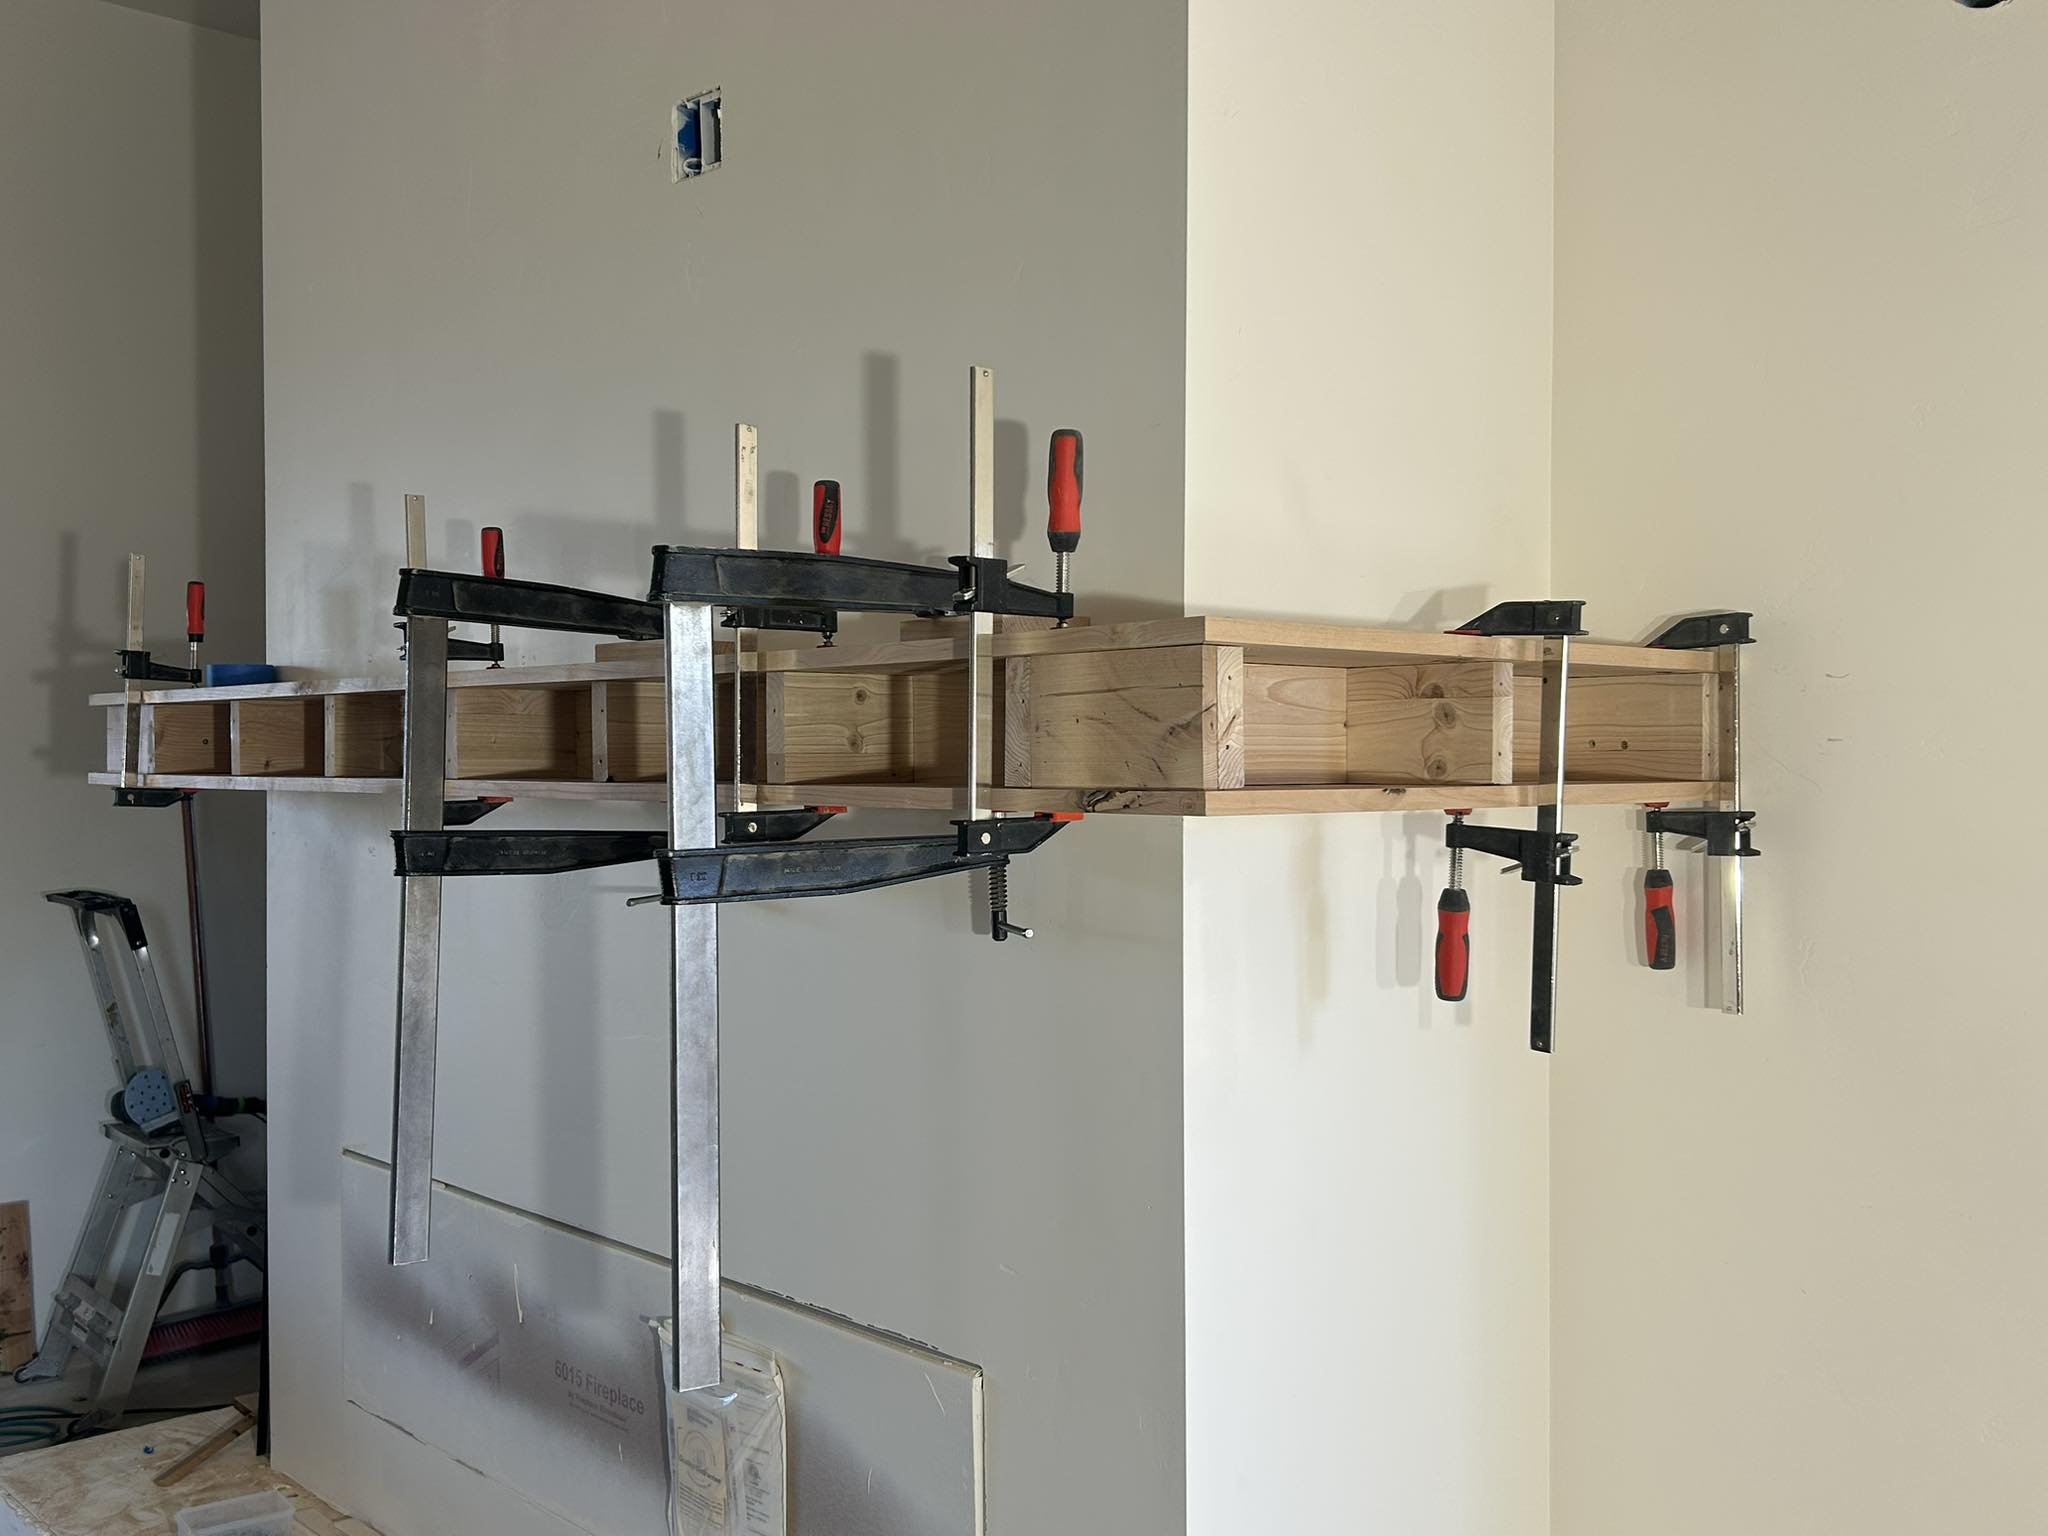
Each joint is biscuited and secured with pocket-hole screws after confirming a perfect fit. While this process takes additional time, it creates a strong, stable structure that maintains its integrity over time.
Large F-clamps are used during assembly to keep everything tight and perfectly aligned while the glue sets.
Once assembled, the mantel is sanded, filled, shaped, and prepared for the final finish.
The Finished Result
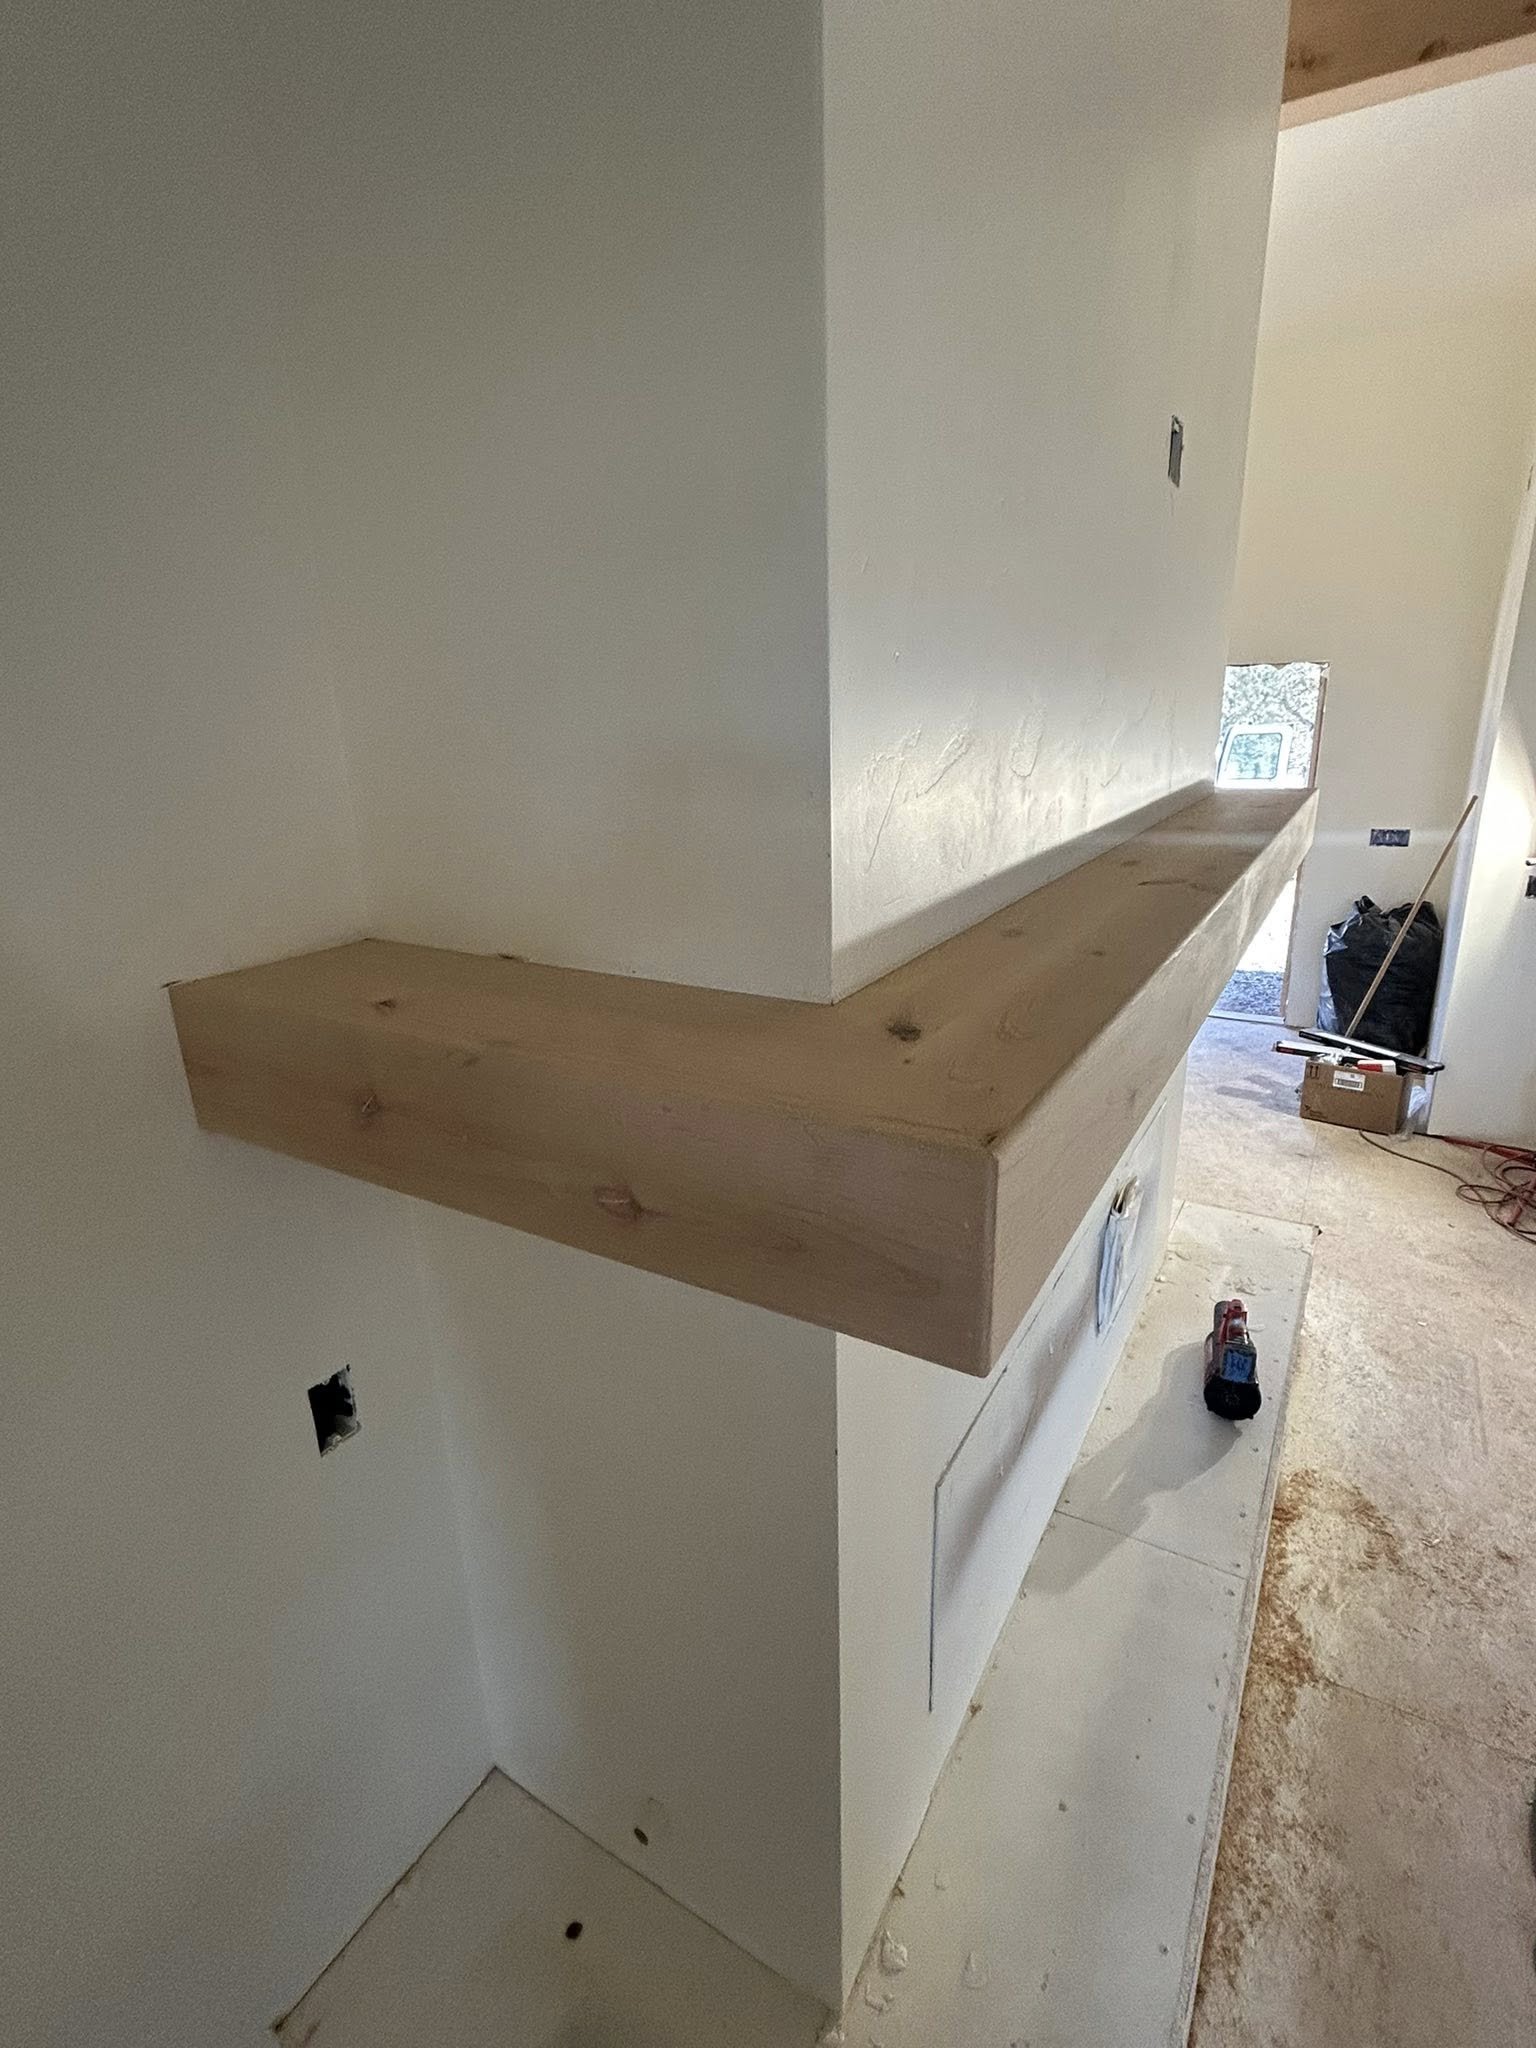
With both the ceiling beams and mantel complete, the room now features striking architectural woodwork that adds warmth, character, and craftsmanship to the space.
Projects like this highlight the attention to detail that goes into custom finish carpentry—from the structural backbone to the final shaping and sanding that prepares each piece for its final finish.
Custom Woodworking in Central Oregon
If you’re considering custom woodwork in your home, Frank L. Garrett Construction provides high-end craftsmanship throughout Central Oregon.
Frank specializes in:
Custom woodworking projects
Frank proudly serves homeowners throughout Bend, Tumalo, Redmond, Sisters, Sunriver, Tetherow, and surrounding Central Oregon communities.
If you have a project in mind and would like a bid or consultation, feel free to reach out and discuss your ideas.